Early Poptropica Guide

First, go to Early Poptropica Island (if you are not already on it). You should be on Main Street. (Remember that if you’re not sure where you are, you can check your Map!) Go all the way to the right until you come across a sign that says “Early Poptropica”. Click on the sign to go there. Go right again and you should arrive at Early Poptropica. Go to the right where you should pass by 3 very pixellated-looking men. Talk to the third one you see. He will say that his pig was stolen by a sneaky spider. Next, keep going to the right again until you see another pixellated man by a well. Talk to him, and he will tell you that someone stole their bucket. Now next to the man you just spoke to, there should be a rope. Climb it, and when you reach the top you should see another pixellated man. Talk to him and he will tell you that they lost their flag.
The Glow Stick - Go back to the man who lost a bucket. Next to him is a well. Go down the well. Then go down the rope you are on. You should arrive in the Storage Cavern. Move a little to the left, and jump downward, to the left side. (To do this, move the cursor to the most bottom left corner and click.) You should arrive onto a green platform. Now jump to another green platform on the top left side of the platform you are on. Move a bit to the left, then jump to the brown platform located on the left side of the platform you are currently standing on. Climb up the rope on the brown platform, then jump onto another brown platform located to the right of the rope you are holding. Now jump up to the platform above you. You should see a glow stick. Walk over to it to get it! You should have gotten an item – “Glow Stick”. Now exit the Storage Cavern. If you don’t know how, just follow the same steps above that showed you how to reach the glow stick, but backward!
The Pig - Now go back to Main Street. Go left until you see a manhole on the ground next to the Soda Pop Shop. Click on the manhole to go down. You should be clinging onto a rope, climb all the way down to get inside the pit. Once inside, jump down to the left where there should be a woman wearing a skull shirt. Go past her and jump on the platform there. On the right there should be a moving platform. Jump onto it when it gets close. Watch out for the little purple spiders hanging above you! If you touch them you will get knocked over. At the end of the ride, jump down to another platform. Then on that platform, there should be another platform next to it – jump onto that. From there jump onto the platform you see on your right. Now jump to the platform on the left, then onto the platform to the left of the one you are standing on. That platform should have a rope below it. Climb down that rope. Now wait for a moving platform to get near, then jump on it! At the end of the ride you should see a pixellated pig. Jump down and grab it. You should obtain an item – “Prized Porker”. Beware of the huge spider guarding the pig, because it will knock you over if you bump into it! Now stay where you are and follow the next instructions!
The Golden Egg - You should still be in the pit, where you’d just grabbed the pig. From the bottom of the pit (where the pig was), go all the way to the left until you reach the end. Click on the end to “Go Left”. You should appear in a tunnel. Go left again. Now you should be in a dark place. You can only see by using your Glow Stick. Now go all the way to the left until you see a rope. Climb up the rope until you reach a place where you have to go either left or right. Now go right until you pass by 2 ropes. Climb the second rope, which you should reach at a dead end. After you climb the rope, go left until you see another rope, and climb that rope. Once you are up that rope, go left until you see a huge golden egg. Walk over to it to grab it! You should have gotten an item – “Golden Egg”. Now go back to Main Street. If you are not sure how, just follow the same steps above that showed you how to reach the golden egg and the prized pig, but backward!
Reaching the Skies -Once on Main Street, go all the way to the left until you reach a sign that reads, “Poptropica Towers”. Click on the sign to go there. Go left again and you should be at Poptropica Towers. Now run all the way to the left until you see a brown building. Jump up on the first window ledge of that building, then the second, then the third and stop at the fourth window ledge. From the fourth window ledge, jump up, but to the left side. You should land on a stone statue. From the statue, jump to the roof of a red building on the left. On the roof of the red building, jump to the left side, where you should now find yourself on the window ledge of a blue building. Keep jumping up onto the window ledges above you and stop when you reach the blue building’s roof, which looks like a mini-restaurant. Between the 2 tables should be a vine. Go up the vine!
The Bucket - Climb up the vine again, and now you should be in the skies. (Note: The Map labels this place as “The Purple Giant”) Go all the way to the left until you see a huge pair of feet. Click on them to talk to the giant. You will give him the Golden Egg and he will lift up his spiky weapon and let you pass. Now go right. Go to the right again, and you should now be in the Giant’s Garden. There should be a gardening tool in front of you. Walk on it as if it were a ramp an you should soon be doing the same to a vine. Now jump off of the vine, and you should land on some gigantic vegetables. Jump off of the vegetables and pick up the pixellated-looking bucket on the ground. You should acquire an item – “Water Bucket”.
The Flag - Now go to the right. Go right again and you should arrive in the Aircraft Graveyard. Jump onto the cans in front of you, then jump again onto the brown aircraft. From there, jump onto the red and white aircraft. Now jump off the white and red aircraft, and grab the jet pack on the yellow table. You should have acquired an item called “Jet Pack”. You can wear this item! When wearing it, you can fly. Please note that this item can only be worn on Early Poptropica Island. Now put on the jet pack and fly back to Main Street. On Main Street, go all the way to the right until you reach a gray water tower. Make sure you are wearing your jet pack, and fly up to the top of the water tower. You should see a pixellated flag. Fly over to it to grab it! You should have acquired an item – “Signal Flag”. Now go back to Early Poptropica.
Returning the Items -Go back to the pixellated man who said his pig was stolen. Talk to him, and the item “Prized Porker” will be removed from your inventory, and the man’s pig will be returned. Now go to the pixellated man by the well. Talk to him, and the item “Water Bucket” will be removed from your inventory, and the well’s bucket will be returned. Now go to the pixellated man who said the Early Poptropicans’ flag was lost. Talk to him, and the item “Signal Flag” will be removed from your inventory, and the flag will be returned to the flagpole next to the man.
Claiming Your Reward -Now how do you get your reward?, you may ask. This is quite simple. Climb down the rope near the man with the flag, and go right. There should be a boat at the very right with another pixellated person. Talk to the person on the boat, and he will reward you with a medallion! You can wear the medallion by going to your Early Poptropica Inventory and selecting the “Island Medallion” card, and clicking on “Put On”. Congratulations!
Shark Tooth Island Guide

First, go to Shark Tooth Island (if you are not already on it). You should be on Main Street. Move to the right and talk to the person wearing white and blue. He will give you an item – “Shark Fin”. You can go to your inventory and wear the fin, but please note that this is optional – you do not have to wear the fin. Now keep moving right until you come across another man, this one wearing a pink flower necklace and a guitar. Talk to him, and he will give you an item – “Carbonated Coconut Milk”. Now keep moving right until you see a sign that says “Ancient Ruins”. Click on the sign to come to a grass road, move right again and you should be at the Ancient Ruins. (Remember that if you’re not sure where you are, you can always check your Map!)
Professor Hammerhead’s Journal Page - At the Ancient Ruins, move all the way to the right until you see a square-shaped rock. This rock is movable. Push it until you see a tree trunk next to you and the rock. Beware of the bouncing coconuts, as they will knock you over if bumped into! Now jump onto the square rock, then climb all the way up the dangling vine above. Land on the first wooden platform, and from there, hop onto the second wooden platform (the one above the first). On the second platform, jump to the left with all your might, and you should land on the roof of the temple. If you don’t, just try again until you do. Once on the temple’s roof, move around until you see a piece of paper lying on the surface. Walk over to it to pick it up. You should have acquired an item – “Translation Key”. This is the translation key from Professor Hammerhead’s journal.
Temple Entrance - Now jump off the roof and go inside the temple. You should now be on a small gray platform. Below you should be several other platforms like the one you are standing on. Jump down to the last platform at the bottom and click on the bottom of the gamescreen to go deeper into the temple. You should be standing on a small gray platform again. On the left, there should be a gray platform that swings. Wait for the swinging platform to come by, then jump on it. At the end of the ride there should be another small gray platform. Jump on that. Now jump down from that platform and you should land on another platform. On the platform you are currently on, move left and jump down to go onto another small platform, and from there, move right and jump down to the water. Swim left until you reach a stone block that you can’t go past. Beware of the tiny purple bats, because they will knock you over if you bump into them! Nearby should be a wooden log floating in the water. Jump on that and then jump onto the stone block. Now jump into the water on the other side. Swim all the way to the left until you can’t go any further. There should be a wooden log floating nearby. Jump on that and you should see a gray platform above you. Jump to that platform, and there should be a moving platform on the right. Wait for it to come by, and then hop onto it. In the middle of the ride, you should see a platform above you. Quickly jump on to that platform. Now you should see a swinging platform above you. When it comes by, quickly hop onto it. When it swings to the most left, jump off to land on a stone surface with a green thing on the wall. Now click on the green thing, and a code-enterer will pop up. Use the translation key to help you figure out the code. The code is the word “OPEN”, but with the symbols shown on the translation key. Once you enter the code, click on the triangle above. If the code you entered was wrong, the lights will flash red and you can try again. If the code you entered was correct, the lights will flash green and you can pass to the left.
Temple Dungeon - Now go left. You will appear in a tunnel. Go left again and you should appear in the Temple Dungeon. Jump onto the vine on the left. Climb all the way down the vine and plonk into the water. Swim all the way to the left, where you should find a statue with a huge caterpillar crawling around it.Climb up the statue until you reach the top of the statue. Beware of the caterpillar, which will knock you over if bumped into! There should be a swinging platform above; wait for it to come by and then hop on to it. When it swings to the left, you should see a platform there. Jump onto it, then jump onto the platform left of that. Jump down left of the spiky wall, and if there’s still a hole to jump through, jump down that. If there isn’t, that means you’ve jumped all the way down. Anyway, once you’re all the way down, keep moving left until you obtain an item – “Old Bone” – by walking over to the bone in the skeleton. Now go back to the right side, where you should jump onto the nearest wooden log in the water. Above you there should be a long brown platform, jump on that. On the long platform, move all the way to the right, and jump on the statue again. Again, beware of the huge caterpillar! Now go back to the top of the statue and hop on to the swinging platform. Go back to the spiky wall, but this time, stay there. Wait for a moving platform to come by, and quickly hop onto it. Wait for the moving platform to go all the way to the left, where you should see another spiky wall. Hop onto the top of the spiky wall, and go left.
Temple Treasure Room - You will appear in a tunnel. Go left again and you should appear in the Temple Treasure Room. Jump onto the vine on the left. Climb all the way down the vine and land at the bottom. Run all the way to the left until you see a brown pot with some green stuff inside, on a stand. Leap over to it and grab it! You should have gotten an item – “Key Ingredient”. Now climb up the vine on your left and when you reach the top of the vine, land on the surface on the left. Now go up. Jump up the 3 platforms and go up. You should now be back on Main Street.
The Medicine Man - Go back to the Ancient Ruins. Once there, move all the way to the right until you see a sign that reads, “Booga Bay”. Click on the sign to come to a grass road, move right again and you should be at Booga Bay. At Booga Bay you should see a man with brown hair and a spotty mustache. Talk to him, and he will give you an item – “Grass Skirt”. Go to your inventory and wear the grass skirt. Now go back to the Ancient Ruins. Push the movable square rock next to the tree trunk again. Now jump onto the square rock, then climb all the way up the dangling vine above. Land on the first wooden platform, and from there, hop onto the second wooden platform (the one above the first). Now climb up the vine to your right. Climb up the long vine again and jump onto the lower wooden platform with glass jugs on your left. From there, jump onto the wooden platform above the one you’re currently standing on (which also has glass jugs), then climb up the vine to your left. Now hop on to the platform on the right of the vine (which has glass jugs on it also) and climb up the vine on your right and jump onto the last platform, the one with Medicine Man on it. Talk to him, and he will make a potion for you to feed the shark with. (You should get an item called “Calming Potion”.) Now go back down to Booga Bay.
Feeding the Shark - Once you arrive on Booga Bay, go all the way to the right until you see a cannon. Click on the wheel on the left of the cannon, and the things on the gamescreen will look smaller, but you can now see the water and the cannon. Now click anywhere above the water. The Calming Potion will shoot out of the cannon and splash into the water. Watch the shark eat the calming potion. Now you will be back in the normal view. The shark will be asleep forever and it is now safe to swim in the water.
The Reward - Now go to the right, and swim through the water (which is now safe because the shark is asleep). After a bit of swimming you should have arrived on some land with 2 coconut trees and a box marked “Fragile”. Go right and you should be on Castaway Island. Run to the right and talk to the man wearing yellowish-brown clothes and a huge gray beard. Now run right again and talk to the boy in the white shirt. Now click on the boy again, and he and the man will follow you. Slowly guide them back to Booga Bay, past the waters and the cannon. You should see a woman wearing purple waiting at Booga Bay. Talk to her, and she will thank you for saving her son (the boy). Then the man with the huge beard will give you your reward, the “Island Medallion”. Congratulations! You can wear it by going to your inventory, selecting the Island Medallion card, and clicking on “Put On”. You’ll also be awarded 100 credits to spend at the Poptropica Store.
Time Tangled Island Guide

First, go to Time Tangled Island (if you are not already on it). Walk to the right, and you will see a woman in front of the lab. Now, go inside Pendelum’s Lab. Once inside, go all the way down the ramps and then go all the way to the left and push the big plug together. This will activate the Future Machine. Next, jump onto the plug, and then up again to where you see a blue light. Talk to the woman you met outside the lab, and she will give you an item -”Mission Printout”. After you receive the printout, you may read it by going to your inventory. Now, enter the blue light. You will appear in a brown world with insects flying above.
Go all the way to the left, where you will see an old man/woman (depending on whether your character is a boy or girl) that looks like your character. Talk to him/her, and he/she will introduce him/herself as you, but 50 years older. Ask if he/she can help you repair the past, ad he/she will give you an item which helps you travel though time – the “Time Device”. The time device is in your inventory now, but it can also be used by clicking on the time device icon now located at the bottom left corner of the gamescreen for easier access.
Now, click to use the time device. Click on the icon of a man in a blue hood with black goggles. You can check which time in the past it is by looking in the middle of the time device. In this case, it is 1953 AD. The knob on the left will turn green. Press the knob to travel through the selected time! (Note: All the areas are in A.D. time, except Ancient Greece, which is in B.C.)
Mount Everest, 1953 -You should have arrived in an icy area. You are on Mount Everest. Where you arrived, you should see that there is a place to walk on the right side. Keep following the “path” (you should easily be able to see which way you should go). After some jumping and climbing around, you should reach a dead end with a rope above you. Go up the rope. Now, you should have arrived on another icy platform. Move to the left, where you will see a man in a blue coat. Ask him why he’s stopped there, and he will tell you he lost his climbing goggles. Move to his left and you will see some small icy platforms hanging above you. Keep jumping higher until you get to the last icy platform. You should see a rope hanging above you. Go up on it. Now you are on another icy platform. Move to the left, where you will see some small icy platforms hanging above you. Again, keep jumping higher until you get to the last icy platform. Beware of the falling icicles! Bumping into one will knock you over, which will slow you down. After a bit of jumping, you should arrive at another platform, covered in snow. Move to the right, and take the brown statue (”Statue of Liberty”). Now, click on the time travel device. Choose the icon with a man with brown hair and a moustache (1882 AD), and press the knob!
Statue of Liberty, 1882 -You should have arrived in a place with a lot of wood. This is the workplace where the Statue of Liberty was built. Go to the left, and enter the house marked “Gadget, Gauthier et Cie”. Go to the right and talk to the man there. Choose the third chat option to give the man the Statue of Liberty you got in Mount Everest. (To do this, tell him, “I found your study model!”) When you give it to him, the time period (for 1882) will be repaired! Now, exit the “Gadget, Gauthier et Cie” house. Now go to the very left, where you will see a man next to a box and a barrel. Jump onto the box, then to the roof of the “Gadget, Gauthier et Cie” house. Move along the roof, and jump onto the chimney. Now jump onto the brown statue on the right. Then jump up to the wooden ledge above, then another ledge. Then jump to the left with all your might! When you’ve landed, you should have acquired an item – “Notebook”. If not, just try again until you do!
The Graff House, 1776 -Click on the time device again. This time, choose the icon of a man with a brown pigtail in his hair and is wearing a black hat (1776 AD). Move to the left, and try to avoid the hedgehogs as they will knock you over if bumped into. Soon you should arrive in front of the Graff House, a very huge red house. Jump up to the rooftop of the house (by using the window ledges). On the roof, look for the chimney with a bag of white rocks. Jump to it, and grab it! You should have acquired the item “Salt Rocks”. Now use your Time Device and click on the woman with a pink turban on her head. Press the knob and you should be in the Mali Empire, 1387!
Mali Empire (Timbuktu), 1387 -You should be in some very brown surroundings. Move to the right until you pass by your second green bush. Above it thee should be a little ledge. Jump on it, then jump again onto the building on the left. There should be some green leaves platform above you, jump on that. Then jump to the building on the right, then to the building above the one you were just standing on. You should see a person with a white turban and blue robe there, and now talk to that person. Tell him/her, “I found your salt rocks!” The bag of salt rocks will be removed to your inventory (and given to that person you were talking to), and the Mali Empire’s time period will be repaired. Now, jump back down to the building just below the Poptropican who you’d given the salt rocks to. There will be a snake there. Move all the way to the right, avoiding that snake (if you hit the snake, it will knock you over!). On the right you will see a small ledge above you made of little circles. Jump to that ledge, and you should see another ledge just like the one you are standing on. Jump to that one, too, and move to the right as much as possible without falling off. You should see a brown stump to your right. Jump to it, and hopefully you will land on the other side. If you don’t, then try again. If you do, continue on with the next set of directions. Make sure you are at the very bottom. If you aren’t, just jump down. You should see a buildng called “Timbuktu Inn” with a big door with round metals on it. Go inside the door. Once inside the inn, move to the right until you see a small silver ledge. Jump on it to jump to the big brown ledge at the top. Move around until you see a man wearing white. Talk to him, and you will be staring at a bunch of papers. The man will be talking to you on the bottom left corner. Click on him to move the dialogue (what he says) along, until he’s done talking. Now a jigsaw puzzle will appear in front of you. Piece the puzzle together (It’s not hard, and it only has 18 pieces!). The picture, when completed, should look like a king. When you’re done, just click anywhere on the screen. The man will give you an item – “Declaration of Independence”. Now go back to the Graff House, 1776. Once there, move to the right, avoid the hedgehogs, and you should soon be in front of the Graff House, a big red house. Go inside. Once inside, move all the way to the right (until you can’t go any further!), and jump onto the platform above you. There you should see a man with a black hat. He is Thomas Jefferson. Tell him, “I have the declaration!” The “Declaration of Independence” will be removed from your inventory, and will be given to Jefferson. The time period of 1776 will be repaired!
Edison’s Workshop, 1877 -Now click on the time device again. Select the icon with a man with brown hair (1877 AD). Press the knob. You should have arrived in Edison’s Workshop (check your map if you’re not sure where you are!). Go to the far left side where you sould see a vehicle which sort of looks like a bicycle. Hop onto the vehicle. Click on the circle on top of the bigger wheel, and the vehicle will move! When it’s stopped, make sure you are still on the vehicle; if not, jump on! Jump onto the branch above the vehicle, then jump to the branch above the branch you are already on. From there, hop onto the gray roof of Edison’s workshop. Run along the roof until you see a colorful piece of stone on a chimney. Jump to it, and grab it! When you’ve landed, you should have acquired an item – ” Piece of Stone”. If not, just try again until you do!
Aztec Empire, 1519 AD - Open up your time device again, and choose the icon of a person wearing a leaf hat. Press the knob. You should now be in the Aztec Empire. Move to the right until you see a long set of steps. Climb all the way up until you see 2 Aztec people. Talk to the one wearing a leaf hat like the one on the Aztecs’ icon on the time device. Tell him you have the sun stone piece, and you will give him the “Piece of Stone” you found at Edison’s workshop. The Aztec time period should be repaired. Now jump off the building with the long set of stairs and move to the right again. Stop when you have passed by a statue. Jump up to the top of the building next to the statue (not the one you jumped off of a while ago) until you see an old lady. Talk to her, and she will give you an Aztec “Warrior Headdress”. Put it on, then jump off the building. Now move to the left, and talk to the guy (the one with the Aztec warrior headdress) near the long set of steps. He will give you an item – “Goggles”. Open up your time device again, and go back to Mount Everest, 1953. Go back to Edmund, the man in the blue coat you met on Mount Everest. If you don’t know the way, reread the instructions in the section above labeled “Mount Everest, 1953″. Talk to Edmund and say to him, “I found your goggles!” The item “Goggles” will be transferred from your inventory to Edmund’s eyes. The time period will be repaired.
Leonardo da Vinci, 1516 -Go to your time device, and select the icon of a man with a brown hat and gray beard. Press the knob, and you will be brought to 1516, Leonardo da Vinci’s place! Once you get there, move all the way to the left until you see a sign that says “Leo’s Workshop”. Jump onto the sign, and then jump onto the big rock in front of it. From there, jump up the 3 stone ledges. On the third stone ledge, you will see some grass. Jump to the grass on the right, and keep moving right until you see another “Leo’s Workshop” sign. Above it is a rocky thing, jump on it, then move to the right where you should be walking on a wooden platform. Stop when you see a gap. Then jump to the other side of the wooden platform. You should see a man there. Above the man is a small wooden platform, jump on that, then jump on the one above it. There should be a small swing-ish ride thing near the platform. Jump onto it, and you will ride halfway down the rope. When you stop moving, jump as far as you can to the top left corner, and you should land on another wooden platform, keep moving to the left to find a stone house. Enter through the door. Once inside, move to the left and jump on the platform there. From there, move to the left again until you see a rope. Climb up the rope, and jump down to land on the machine thing. Then hop on to the platform on the right, and keep moving right until you see a man wearing brown. He is Leonardo da Vinci (Leo). Talk to him, and tell him, “I found your notebook!” The notebook you found in 1882 (Statue of Liberty) will be given to him, and will disappear from your inventory. The time period will be repaired! But as a reward, Leo will give you an item – “Glider”! You can wear this and it will help you sort of float in the air. Put on the glider, and now leave Leo’s workshop. Go back to where you found that man on one of the wooden ledges, and below him should be a silver medal, with a white glow around it to make it easier to find. Glide over to the silver medal, and if you were successful, you should have gained an item - “Peace Medal”. If you were’t successful, keep trying until you get it!
Lewis and Clark Expedition, 1805 -Now go back to your Time Device. Select the icon of a man wearing a brown hat and brown hair with a pigtail in it. You should now be in 1805. Move all the way to the right until you see a tree. Jump up the first tree arm, then the second, and keep going until you reach the top of the tree. On the top, a beaver will pop up his head every few seconds with a stone bowl on his head. Reach up there and grab it. You should acquire an item – “Stone Bowl”. Go back down to the ground, and move all the way to the right until you see Captain Meriwether Lewis, the person whose face was the icon of the 1805 time period on the time device. Talk to him, and tell him, “I found the peace medal!” The time period will be repaired.
Great Wall of China, 1593 - Open up your time device again, and choose the icon of a person wearing a gray helmet and black moustache. Press the knob. You should now be in the Great Wall of China. Move as much as you can to the right. Pick up the barrel you see there. You should have acquired an item – “Gunpowder”. Now move to the left until you see the first wooden building structure you passed by a while ago. Jump up on the first ledge, and then the second one (with a Chinese woman on it). Watch out for falling bricks, because they will knock you over if you crash into them! Now jump to the other side (right side). Above you should be another wooden platform (with 2 gray bricks), jump on that. Hop on to the wide gray ledge above, and go right until you see a Chinese man wearing fine red robes. Talk to him to play a memory game. To play, just look at the tile at the top. Then below it are 8 other tiles. Look for a tile among the 8 that is identical to the one on top. Then the man will shuffle the tiles. Keep track of where the identical tile is! When he’s done shuffling, select the card out of the 8 that you think is the tile identical to the one on top. If you get it right, he will give you an item – “Amulet”. If you were wrong, you can keep trying as many times as you like to get the amulet. Also, if you’ve already gotten the amulet, you can still play the game (by talking to him again). Now move to the left, until you see another wooden structure on your left, above you. Jump to it, and move a bit more. You should see a rope. Grab hold of the rope, and then let go facing the left so that you are now standing on another wooden platform. Now move to the left, and jump off the platform (structure). Make sure you jump leftways. You should land on a gray wall. Move around the gray wall a bit until you see a man. Talk to him and tell him, “I have the stone bowl!”. The item “Stone Bowl” will be transferred from your inventory to the Chinese man’s possesion. The time period will be repaired.
Vikings, 831 -Use the time device again, and this time select the icon of the Viking (man with brown double pigtailed hair, wearing silver helmet). You should be on a Viking ship. Move all the way to the right until you enter land. Talk to the first Viking (yellow shirt, silver helmet, gray hair), and tell him, “I have your amulet!” The item “Amulet” will now be owned by the Viking, and it will be removed from your inventory. Time period repaired! Now move to the right and jump onto the long stone platform with some green on it. From there, jump onto the next one, then the last long stone platform. You shoud be in front of a cave with the entrance blocked by a bunch of rocks. Click on the rocks to use your “Gunpowder” on them. The entrance will be cleared, and you will lose your gunpowder. Now, enter the cave. You’ll have about 30 seconds inside the cave to find the golden vase inside. After 30 seconds, the torch will burn out and you will have to try again if you want to get the vase. You can try as many times as you like, so don’t worry if you don’t get it the first time! (Hint: The golden vase is at the bottom of the cave. Avoid the water at the bottom. Don’t take your time because if you don’t move quickly, the torch will burn out, but don’t be too quick because you don’t want to make mistakes and go to the wrong parts of the cave!) Once you see the vase, move to it, and you should gain an item – “Golden Vase”.
Directions for the Cave:
First, jump down and land on the place with a small pile of skulls and bones as a decoration. From there, jump up to the stone ledge on the right, and then jump up to a small stone ledge locate above where you are. There, you should see yet another stone ledge to the right. Move all the way to the right, until you come to a gap. Fall down the gap, and from there, navigate your way through the bottom of the cave maze. At the bottom, there is water. Make sure you don’t touch the water, because if you do, your torch will burn out by the water. Jump over the water to a stone on the left side, and keep jumping over the water, moving to the left, until you see the golden vase. Once you see the vase, move to it, and you should gain an item – “Golden Vase”. Grab the torch near the vase and navigate your way to the cave’s exit to get out. Alternatively, after you get the vase, you can just step into the water to get back out of the cave, and it will save some time.
Ancient Greece (Delphi), 328 B.C. -Now open up your time device, and choose the image of a soldier wearing a brown full helmet with red feathers on the top. Press the knob and you will be tranported to Ancient Greece, 328 B.C. Once there, move to the right and talk to the second soldier. Tell him, “I have the golden vase!” The item “Golden Vase” will be removedfrom your inventory, and it will be placed outside of the Treasury in Ancient Greece. The Treasury is the building the two soldier guards are standing in front of. The time period will be repaired. Now move to the right until you see another man. Near him should be a vase, jump on it. From there, jump onto the white statue next o the vase you are standing on. Then jump on top of the statue, and then jump to the top left corner. You should land on the roof of the Treasury. Move around the roof, and you should see Edison’s phonograph. Move to it to take it. From your inventory, you can click on the arrow sign on the Phonograph item card to listen to some noises. Now go back to Edison’s Workshop, 1877. Once there, move along to the left, until you reach the entrance door to Edison’s workshop. Enter it. Once inside Edison’s workshop, move all the way to the left until you can’t go any further. From there, hop on to a nearby table, and then jump onto the lightbulb line on top. Next, jump up to get to the long platform above. Move around until you see a man wearing a red vest. He is Thomas Edison. Talk to him and say, “I have your phonograph!” The item “Phonograph” will be transferred from your inventory to Edison’s possesion. The time period will be repaired.
The Future, 2058 - Now that all the time periods have been repaired, go back to 2008 by opening your Time Device and choosing the word “LAB”. Enter Pendelum’s Lab, and enter the future again. (If you’ve forgotten how to get to the Future, read the sentences at the very top of this page.) You will now be in The Future, 2058! It’s a really cool place here. Have some fun exploring it! When you’re ready, follow the next set of instructions to learn how to get your island medallion, the reward.
Claiming the Reward
Once you’re in 2058, the Future, move all the way to the right. From there, fly up to the Monorail Stop by using the blue tube that will shoot you up there. Wait for the Monorail to arrive, and then get inside. Climb up the top of the Monorail when you reach the end, and it will shoot you up to a place near where the Hovering Platform is located. If you were landed on a blue building’s platform, move to the left to find the Hoering Platform. If you were landed in a green grassy place, the Hovering Platform should be right next to you. The Hovering Platform is gray colored, and small. Hop onto it to go up. When it stops, that’s where you get off. Jump onto the grass platform on your left, move left, and enter the blue tube there. You will now be in your Sky Home!
At your Sky Home, move to the right until you come to a gap. Jump over the gap, and you should be on a similar platform to the one you were standing on, except that it was on the other side. Keep moving all the way to the right, and you should see a person there. That person looks like you, except he/she has white hair and is wearing glasses. This is because that Poptropican is you, only 50 years in the future! He/She will give you the quest reward, the Time Tangled island medallion. Congratulations!
24 Carrot Island Guide

First, go to 24 Carrot Island (if you are not already on it). You should be on Main Street (if you’re not sure where you are, check your Map). Move to the right and enter a building labeled “Charlie’s Carrot Surplus Co.” Once inside, move to the right and talk to the person you see. If you ask her who she is, she will introduce herself as Charlie. Ask her, “Feeling down?” She will tell you that she lost her cat, Whiskers, and that if you can find her, she will give you a crowbar for free!
Finding Whiskers the cat - To find Whiskers, Charlie’s cat, first leave Charlie’s store. Go left where you will see a sign that says “Carrot Farm”. Click on the sign to go there. Now, go left again and you will be at the Carrot Farm. Move a little to the left, and you should see a house with a door blocked with wooden planks. Jump up on the ledge near one of the house’s windows, then up again onto the blue roof. On the roof, jump near the chimney, and click on the chimney to enter it. Now you are inside the house. Move to the right, where you will see a white bowl lying on the ground. Walk on it to pick it up. Now leave the house by moving to the left and exiting by the red fireplace (which leads to the chimney you entered from a while ago). Exit the Carrot Farm.
Back on Main Street, go inside the building labeled “Carrot King Diner.” Move to the left, and talk to the lady with blonde hair holding a pitcher of milk. Ask her to help you fill your bowl with milk. Your bowl will now be filled with milk. Now go back to the Carrot Farm, and go inside the house where you found the milk again. There, you automatically will set the bowl where you’d found it. Now go all the way to the right, and climb up to the second floor by climbing up the black rope holding the light. On the second floor, go all the way to the left, until you reach the bath tub on the very left. Turn on one of the faucets, and Whiskers the cat will jump out of the bath. Now, herd (chase) the cat down to the bowl of milk which you set on the ground. Chasing the cat down is a bit hard. Once the cat drinks the milk, it will follow you. Slowly, guide the cat back to Charlie’s store. Return Whiskers to Charlie, and Charlie will give you an item – “Crowbar”.
Going inside the Factory - Go back to Main Street. Move all the way to the right until you see a sign that says, “Factory”. Click on the sign to go to the factory. Go right again, and you should appear outside the carrot factory. Climb onto the roof of the factory, where you should see a blue scroll sticking out of the top window. Jump to it and grab it! Now jump down, and you should see some red cans with a white skull on them. Jump on one of them, and near it should be a huge brownish-green pipe. Click on it to use your crowbar and pry open the pipe. You can now enter the factory! Click on the pipe again to enter it.
Inside the factory - You should now be in the sewer. Move left and grab the colorful carrot lying on the ground. You should acquire an item – “Carrot Transporter”. You can use it to transport you outside the factory. Above you should be a small ledge, jump on it. Now jump onto the platform to your right. Go across the red trapdoors, and avoid falling down. If you do, don’t worry, just try again. Avoid the big brown rat by using the extra pipe above you. At the end of the pipe, go up.
The Master Engine Room - You should have arrived in the master engine room. Pull the green master engine’s middle lever down all the way, and pull the other levers only halfway. Now, climb up to a platform with a pyramid of barrels and a stack of boxes. Jump onto the stack of boxes, then wait untl the claw comes around. When it arrives, jump onto the claw, but then jump onto the top. If you stay on the bottom you can fall through its hole, so be careful. Ride the claw all the way to the far right platform. There should be a vent, enter the vent.
Vent System - You are now in the vent system. Use the bluepints to help guide you to the Processing Room. Along the way, you should find some wire cutters. Pick them up. Then continue working your way to the Processing Room. Jump to the ground. Wait for the security system to automatically transport you to the Freezer.
The Freezer - You should now be in the Freezer. (Remember, if you’re not sure where you are, check your Blueprints.) Click a small metal box on the wall labeled, “Security System”. Use the wire cutters to cut the all the wires. Climb up to a high platform to enter the vent system again. Use the blueprints to help you return to the Processing Room.
Processing Room - Now you’re back in the Processing Room. Talk to all the mind-controlled people (choose the third option in the chat) to distact them so that you can press the power button in the middle of their rabbot ears. The mind-controlled people will now be free! Now, go over and click the big metal doors. You will fall down in a trap and land into the Smelter Room.
Smelter Room - You should now be in the Smelter Room. Jump down the red platform to land on a conveyor belt. Move to the far right end of the conveyor belt and jump up onto the pipe. Now jump on top of the machine and grab the drone rabbot ears. You should have gotten an item – “Drone Ears”. Go to your inventory and put them on. Scroll over the word “Exit” on the pipe and click. You should be brought back into the Processing Room.
Printer Room - Now go back to the vent system and get to the Printer Room. At the Printer Room, make sure you avoid the falling crates, because they will knock you over if you bump into them! Now disable the mind-controlled drone near the printer by talking to her and pressing the power button in the middle of her rabbot ears. She will give you a printout with a password on it – “fuzzybunny”. Grab the paper and make your way back into the Proccessing Room.
Processing Room - Make sure to have your rabbot drone ears on! When you do, go back over to the big metal doors and click on them. You should now be in the Rabbot Room.
Launching the Rabbot – Talk to Dr. Hare. Climb onto the giant rabbot and go to the right platform. Disable the mind-controlled drone there. Click on the computer to use it. Enter the password as “fuzzybunny”. Next, enter “launch rabbot”. Steer the rabbot into four meteors. When the rabbot hits the fourth meteor, it will be destroyed and Dr. Hare’s plan will be foiled! Now go to your inventory and use the “Carrot Transporter” to take you out of the carrot factory.
Claiming Your Reward - Now for your reward. Go back to Main Street and go all the way to the left side where you should see the mayor. He is wearing a black top hat. Talk to him to claim your reward, the Island Medallion. Congratulations, you have completed the 24 Carrot Island Quest!
Super Power Island Guide

First, go to Super Power Island (if you are not already on it). Go inside the Comic Shop, and walk to the right until you see a person dressed like a “nerd”. Talk to him, and when you ask him who he is, he will introduce himself as Ned Noodlehead. Ask Ned if he has anything other than comic books. He will give you an item called “The Superhero’s Handbook”, which you can read if you go to your inventory and select the book and click on “Examine”. Now leave the Comic Shop.
Next, go inside the Masks & Capes building. On the left side is a man. Speak to him to obtain a Super Hero ID, which identifies you as an official superhero. On the right, there are several superhero costumes to choose from. Clicking on one of the dummies dressed in a superhero costume will show a Costumizer window where you can choose to wear some of the superhero clothes.
Leave the Masks & Capes building, and go to the left until you have passed through the water and see a big green meteor. Talk to the prison warden, and he will give you an item called “Super Villain Files” (which can be Examined) and “Anti-Power Handcuffs”. Now move all the way to the right until you see a sign which says “Down Town”. Click the sign (or near it), and do it again on the street you appear at, and you should arrive at Main Street.
At Main Street, you will see a bank. The police officers nearby tell you that one of the escaped prisoners, Copy Cat, is inside the bank and they can’t catch her.
How to catch Copy Cat: Go inside the bank. Move to the left, where you will see Copy Cat. Copy Cat will make lots of copies of her and the copies will each rush to a spot in the bank. The last Copy Cat drops a can of smoke. (Because of the smoke, you will have to be quick to catch all the copies of Copy Cat, or else your character will run out of fresh air and will be teleported to the bank.) All you have to do is run into every copy of Copy Cat.
Most of the copies should be easy to reach, but there are 2 copies standing on the lamps, and they are hard to reach. To reach one of them, you must jump onto the gray circle, then jump on the ledge next to it (to the left of it), then from the ledge, jump to the light. Then, go back down to catch the others. To catch the other one, jump onto the brown box with a glass window (on the right side), then jump on the ledge next to it (to the right of it), then from the ledge, jump to the light. After that, go down to catch the other copies. Ride the elevator (located on the right) up (by pressing the up arrows) to the second floor to catch more copies. The last copy should be Copy Cat, and when you run into her you will use your Anti-Power Handcuffs and capture her. A copy of “The Daily Paper” should appear after you defeat her saying that Copy Cat had been defeated.
After you capture Copy Cat, you will be transported back to the County Prison, and see that Copy Cat is back in her jail cell. Now, go back to Main Street. Move all the way to the right until you see a “Subway” sign. Near the sign should be some stairs going downward. Click on the steps to go down. You will appear at the Subway Station. The police officers will tell you that Speeding Spike is in the subway train when you talk to them. Go to the right where you will see a train. Enter it by clicking on it.
How to catch Speeding Spike: Go inside the subway train. Move all the way to the right until you see Speeding Spike (who is on the last train carriage). To catch him, you must avoid bumping into him as much as you can to tire him out. Eventually, as you keep jumping over him to avoid getting whacked, you and Spike will move from train carriage to train carriage until you are back at the train carriage you started on. Spike will slip on the puddle of water. Walk up to him to handcuff him. Again, a copy of The Daily Paper will appear saying that Speeding Spike had been caught. Close it, and you will be brought back to the County Prison, where you will see that Spike is safely back into his jail cell.
Next, go back to Down Town. From there, you can choose to fight 3 more villains: the Crusher, Ratman, or Sir Rebral. You cannot fight Betty Jetty yet, because she is the last one. Here is how to defeat those 3 villains:
How to catch Sir Rebral: Go to the City Park, which is on the left side of Down Town. It will show you where Sir Rebral is. Walk around the City Park and look for the movable rock. It is gray and round. As you move around the City Park you will notice that the ground will occasionally fly up and might hit you. Move the rock so that it is in a place where the ground will fly up at. Try to get the rock to fly up so that it hits Sir Rebral. If it doesn’t hit him, keep trying until it does. This may be a little tricky for some of you. Some say that you may need to get the swirling rocks around Sir Rebral to hit him, so that he’ll “get mad”, and THEN use the movable rock to hit him. When Sir Rebral is hit, walk over to him to handcuff him. Again, a copy of The Daily Paper will appear saying that Sir Rebral had been caught. Close it, and you will be brought back to the County Prison, where you will see that he is safely back into his jail cell.
How to catch Ratman: Go to the City Park, and move to the left until you see a public washroom. Enter it, and go down the hole you should see while you are in it. You will be brought to the Sewer Entrance. Move to the left until you see a red wheel. Turn it to start moving downwards. When the water stops, move to the right until you see some bricks. Jump on them to find another red wheel. Click on it to turn it, and the water will go up again, but not completely to the top. Swim left and you should find a door you can enter through- enter it. You should now be in the Sewer Room. Try to avoid all the rats, as they will knock you over if you bump into them. Jump up to the top right corner of the Sewer Room, where you should see a red wheel. Click on it to turn it, and it will sprinkle water over the Ratman and his flies. Ratman’s flies will leave him, but unfortunately, they will start following you! Move quickly to avoid getting stung by the flies, because getting stung will knock you over, slowing you down. Quickly make your way to Ratman to handcuff him. Once again, a copy of The Daily Paper will appear saying that the Ratman had been caught. Close it, and you will be brought back to the County Prison, where you will see that he is safely back into his jail cell.
How to catch Crusher: Go to the City Park, and move all the way to the left, where you will see a sign that says “Junkyard”. Click on the sign to go to the Junkyard. If you talk to the police officers at the Junkyard, they will tell you that they are having trouble catching the Crusher. Jump onto the fence, then onto a few boxes and stuff above the fence, until you get to Crusher’s platform. Try your best to avoid getting whacked, because if you do you will need to jump through all the stuff again. From Crusher’s platform, jump onto some nearby red cans on the right side. You will see a wooden tower-looking thing above you. Jump as high as you can to the wooden tower-looking thing, and keep jumping until you reach the top, where you will see something that looks like a vehicle. Enter it, and you will be shown a Magnet Control. Drag the control’s lever to the other side, and you will see a can above Crusher drop on him. Then, just as you think you’ve beaten him, Crusher comes alive again, and this time, he’s throwing cans at you! Avoid getting hit by the cans as they will knock you over, slowing you down. Climb back up to the Magnet Control again, and drag the lever back to the other side. When you do, Crusher will be defeated. Walk over to him to handcuff him. Again, a copy of The Daily Paper will appear, this time saying that the Crusher had been caught. Close it, and you will be brought back to the County Prison, where you will see that he is safely back into his jail cell.
Now that you have defeated 5 villains, go talk to the retired superhero on top of The Daily Paper building on Main Street. Go back down and answer the ringing telephone by clicking on the phone booth. When you answer the phone, you will be granted the power to fly! This power lasts as long as you want, but it is only available on Super Power Island. To de-activate it, just click on the new “Flying” icon that appears at the bottom left corner of the gamescreen, and click it again to activate it again. When you feel you’re ready, follow the instructions below to defeat your last opponent, Betty Jetty!
How to catch Betty Jetty: Go up to the very top of the Skyscraper, which is in Down Town. She will fly away, and you must chase her. Make sure your flying power is activated! Then, go and chase her through the skies! She will start throwing this green smokey thing at you. Try your best to avoid it. When you are close enough to her, bump into Betty Jetty to capture her! When she is captured, Ned Noodlehead (the Comic Shop owner) will appear, and knock Betty over. Again, walk over to the villain to handcuff her. A copy of The Daily Paper will appear saying that Betty Jetty had been caught. Close it, and you will be brought back to the County Prison, where you will see that she is safely back into her jail cell.
Claiming your Reward: Of course, there should be a reward, right? To claim it, just follow the steps listed here.
1. Go to the City Park, where you will see a hot dog stand. Talk to the hot dog seller, and then jump onto the hot dog cart to get a hot dog.
2. Go back to the Comic Shop, and talk to Ned Noodlehead. He will offer to trade his medallion (Which was awarded to him because he’d knocked over Betty Jetty.) for a hot dog. Accept the offer, and the hot dog will be given to him, and you will receive the Super Power Island Medallion. Congratulations!
Spy Island Guide

First, go to Spy Island. Go to the headquarters and find Director D. Talk to him and get the decoder kit. Get out and jump to the top of the building. There will be a guy there. Then translate the message you get from the guy on top of the headquarters. The coded message says, when Dr. Spyglass points to a symbol, choose the one that faces in the… “OPPOSITE DIRECTION”. Then go to Dr. Spyglass’s, the eye doctor, building. Take the eye test but whatever the doctor points to, choose the ”E” that faces the opposite direction. (An “E” facing upwards would mean that you needed to choose an “E” facing downwards.) If you did it correctly, he will say “I see that Director D has sent you. Meet me upstairs.” Then he will go to upstairs, and you will have to exit the “Dr. Spyglass’s” building, climb the ladder to the left until you see a door and enter it. Once inside talk to Dr. Spyglass again and he will give you a suit that will make you almost invisible. The suit is called the “Chameleon Suit”.
The 1st Spy - Now go to the Docks and get the message from the guy in the trash can. He will give you a message that says, “There’s a secret entrance to the warehouse ON THE ROOF”. Now put on your chameleon suit. Climb as high as you can there and avoid the B.A.D. guards, because if you bump into them they will knock you over and because they can see you when you move. You’ll find a door. Go in and continue. Be careful of the dogs. They’ll bite you. Then there is a room you can go in.Then go to the roof and get inside. Go past the dogs by rushing at them, but not letting them touch you. Then stop. They can’t see you because of your suit, and they will walk on. Do this with all the dogs. At the bottom, go left. You should see some little platforms above you. Get on them, and jump to the other side. You should have landed in some kind of small hidden room. Talk to the tied up spy there to free him. He will give you a laser pen and a satellite clue.
The 2nd Spy - Now leave the warehouse and go back to Main Street. Then go all the way to the right and go to Balding Avenue. If you continue to the right you will see a guy wearing green camouflage. Talk to him and he’ll give you a message that says, “There’s a top B.A.D. agent in BISTRO.” To access the B.A.D. control center you’ll need his “FINGERPRINT”. Keep going right until you get to a place called B.A.D. Bistro. Take off your suit and go in (The chameleon suit isn’t allowed inside.). Go all the way to the right to the kitchen and talk to the chef. Ask to apply for the job and he will tell you that you need to pass a test. It’s simply a game of Simon Says. If you win the game then he’ll give you a chef’s hat and if you win, you become a chef, if you lost, try again. Then you go to the table with people at it and click on the guy with the mustache. He’ll ask you to fill up his glass. You’ll get the glass with his fingerprint on it. Go back into the kitchen and jump on the fridge then jump on the shelf and there will be an opening above you. Go through it and jump from lamp to lamp till you get to the wall. Then fall to the ground and get out of the room.
Go right and you’ll see another guy in camouflage. Talk to him and he’ll give you an item -”File X” - that you must decode. If you read it the way you’d normally read a letter, it tells you what a great man Director D. is and how you have to trust him. But don’t get fooled too easily! This file really contains the opposite of what it’s trying to say. Now here’s how to decode it: all you need to do is read the first letter of every line and it reads “DON’T TRUST DIRECTOR D”. Simple yet tricky! (Note: You don’t have to know what the file actually says to complete this quest, but it’s good to be warned about Director D. first, and you’re probably curious anyway.)
Now continue right and go to Toupee Terrace. Then you have to carefully get to the top of the house without getting zapped. It may seem hard at first but once you get the hang of it, it’s pretty easy. What you have to do is jump from window ledge to window ledge until you reach the top, and watch out for the yellow zappers, because they’ll knock you off if you bump into them! When you get to the top you’ll find a window with bars in front of it. Get in front of the window and it will show a close up of the window. Your mouse is now the laser pen. Click on the bars to cut them to pieces. Then you’ll be able to get in. Go inside, and you’ll be in the attic. Now go left and you will see another secret agent tied up there. Free him and he will give you an item - ”Grappling Bowtie”. This will help you reach high heights. He’ll also give you another satellite clue.
The 3rd Spy – Get out and go back to Balding Avenue. Now go as high as you can using the grappling bowtie. (To use the grappling bowtie just click on the bowtie on the bottom left and click which way you want to go.) Go up to the rooftops. Use your grappling bowtie to try to grab another platform. Be careful, there’s a B.A.D. guard there. Now use your grappling bowtie to try to grab another platform or antenna at the top left. Talk to the guy there. Now aim your bowtie to the far right and try to grab another antenna. When you swing over there and are directly above the building click again (at the top of the screen) so that they let go of the rope. Otherwise they will swing back.
Then enter the tube thing. You are now in a greenhouse. It is recommended that you take off your Bowtie, because wearing it will make this part more difficult. Go to the far right and you will see a cherry bomb tree. Click on the cherry bomb and move the cherry bomb left. Now push it to the flower thing on the ground and it will bounce it to a higher floor. Get on that floor and push it to the left till it falls on the lower platform. Push it onto the other bouncy flower thing and it will go to a higher platform. Go to that platform, (Watch out for the flytraps. It will throw you off!) and finally it to the cage with the spy agent girl trapped in inside. Now push the cherry bomb in front of the cage and wait until it blows up. When it does, the cage door breaks and the girl is free. The spy will give you a pair of “Ultra-Vision Goggles” and the last satellite clue.
Director D. - Now leave the greenhouse and go back to Balding Avenue. Move right and go to Toupee Terrace. Go all the way to the right again until you reach the B.A.D. control center. Go to the B.A.D. Control Center, and put on your ultra-vision goggles. You will see that the zaps are timed, so you will know when it is safe to go. Move along to the right, then when you reach a dead end, move up. Soon you should see a door. Click it and use the fingerprint on the glass to unlock it. Once you’re inside the room, climb up the platforms, avoiding all zaps. When you reach the top you will see a computer. Click on it and enter the passwords, or passcodes. The three passwords for the teleporter are 1: laser 2: hair 3: removal.
Then Director D. will show his true self. Go into the teleporter and Director D. will say something. Then his mini bots will come out. To destroy the mini bots lead them to those yellow orbs when their plugs hit it they will explode. There will be 4 minibots, and there are 4 yellow orbs – one on the bottom right, one on the bottom left, one on the top right and one on the top left. Use your bowtie to help you get to the top parts. When Director D. fights you with his machine, make it crash onto the ceiling four times. To do this, get onto the top of the machine while it is moving and wait for it to crash, or make your way up to the ceiling (with your grappling bowtie) and hang in there. The machine will be along and it will crash. (You will know when a crash was successful if you see the word “CRUNCH”.) Alternatively, you can use your bowtie to get yourself on the ceiling, then hold on so that you stay swinging on the ceiling. You will be luring Director D.’s machine to you and when it gets to you, it will crunch on the ceiling but knock you off, where you can continue to try and crunch the flying machine again.
The Reward - When you defeat Director D., you will be brought back to the headquarters. The top secretary in the spy headquarters will present you with your reward, the island medallion. Congratulations, you’ve completed the Spy Island Quest! Director D. will be locked up in a little prison cell inside headquarters, and you will be the new director! At the beginning of the quest, you might have noticed there was a screen that said, “Welcome, Agent <your character’s last name>.” Now that you’re the new director, the screen should change from saying “Agent” to “Director”! For example, if your Poptropican’s name is Scary Tomato (that’s me), you would be “Director Tomato” after you defeat Director D. However, this is only your spy agent name – when you’re in multiplayer battle/chat rooms, it doesn’t apply. Congratulations!
Nabooti Island Guide

First enter Nabooti Island via the Poptropica Blimp.
Once there, turn to your left and go inside the Nabooti African Museum in the tree. Inside there are lots of monuments of tribes from Africa. Walk to your left, fall down then walk to your right until you see the Nabooti Monument.
Talk to the girl standing left of the statue. She will tell you the story of the five missing jewels. When she asks you if you would like to find the jewels, click ‘Yes! I’m in’. She will hand you a map of Africa.
ii) Venture your way outside and walk to your left until you see a plane. Click on the seat. It should say ‘FLY’.
It should now bring up a map of Africa. Your mouse is now the plane. Fly your way over to the right until your reach a point called Mountains of the Moon. Click on it or place your plane on the dot.
2.i) [Beware of the Goats and falling boulders at this place.]
Run to your left and jump over the Goats. Go through the water and jump over the next Goat. Keep going until you’re at the end. Stop. Let the goat run at you and whack you up to the next ledge.
Jump on the tree to your right, then again, then jump up onto the next ledge where the girl with blue headwear is.
Talk to her, she will tell you she wants the red fig that is above you. Jump on the boulder to your left then jump at the red fig. You should be able to reach it.
ii) Go right, jump over the flowing water, (Note: Boulders will crash on you if you stay in one spot.) and keep going until you reach the end. Jump up onto the next ledge and then make a big jump over the goat and land on the ledge on the other side. Jump the small gap until you reach some icy slopes. Jump um the icy ledges (They are slippery), then right, then jump up on the ledges until you reach the old man.
He will not let you in the cave unless you beat him in Mancala.
Once you win, enter the cave.
iii) Fall down to the bottom to pick up the cell phone. (For more information on what you can do with the phone click here.)
Jump up the rocks until you’re on a rock that overhangs out from the main rock. Jump on the rock column right of you. Jump so you don’t hit the hanging icicles. They will hit you to the ground. Slide off this rock to the next, Jump up on the next column, slide onto the next one and then finally run off the edge to land on the ledge with the Red Jewel.
Now fall down to the bottom and make your way out of the cave. Fall down to the bottom of the mountain and get in the plane again.
3.i) Fly your plane North-East to a dot called Blue Nile Falls. Once there, jump onto your plane, then jump onto the grassy ledges, and jump up to the top of the cliff where there is a Purple Flower, called the Egyptian Blue Flower. Walk over it to get it.
ii) Go back down the cliff, go across the water until your reach some more grassy ledges. Follow the grassy ledges to the top to find a woman with a Chicken, corn feed and a Fox. Talk to her and ask if she needs your help. This should start the game.
iii) To solve the problem follow these instructions:
-Bring the chicken to the other side.
-Bring the feed to the other side.
-Bring the chicken back to the other side.
-Bring the fox to the other side.
-Bring the chicken back to the other side to finish the problem.
When complete the women will tell you about the secret cave behind a bush to the right of the waterfall.
Jump off to the right and try land on the ledge with the large bush. If you don’t then jump up on the rocks till you get to it.
Click on the large bush to reveal the secret cave. Now enter the opening.
iv) Once inside jump onto the skinny column to your right. Keep jumping right. (Note: Do this fast because spikes will fall on you, if you fall just make your way to the left and start again.)
Once you reach the end walk over and grab the purple jewel.
Go back outside and make your way back to the plane.
4.i) Fly your plane left, back to the dot named Nabooti. Once there walk right until you see a stall. Talk to the woman wearing orange clothes. Trade your purple flower for a turban. Run back to the plane.
ii) Fly your plane north-east to a place called Giza. Once there go into your Items and put on your desert turban. Go to your right until the man gives you a shovel. Walk to your right until you see a man outside a tent. Go into your items and view the shovel. The number on it belongs to the man in front of you. Go to your phone and dial this number: 555-6789
Once done the man in front of you and his workers will have left. Click on the bag in front of you to receive the Moon Stone. Now go left and then jump up on the Egyptian structure. Go to the top where a ring is. Go into your items and click ‘Use’ on the Moon Stone. It will open a passage way down below.
Go down and enter it.
iii) Go to your right until you see a block with four rectangles on it. Click on it. These rectangles move the platforms ahead of you so you can access the next room. The aim is to make all of the rectangles flat.
Follow the instructions below in order to make them flat:
-Click on number 1 rectangle.
-Click on number 3 rectangle.
-Click on number 4 rectangle.
Go right and jump up onto the platforms. Avoid the scorpion below the platforms! Keep going right until you see the next passageway. Go into it.
iv) Jump up the small rocks to reach a room with four blocks. You have to match the blocks with the same pattern as the bottom one.
Follow the instructions below to make them in order:
[If you make a mistake pull the reset switch to try again.]
-Push block number 4 off and push it left until it is roundabout where the reset sign is.
-Push block number 1 off and push it to number 4.
-Push number 2 off but then push it so it is under the ledge.
-Push block number 3 of and align it with the others.
-The block order should be now: 4 – 1 – 3 – 2
Push the groups of blocks until it’s in front of the carvings on the wall. This should open up the next passageway. Jump up on the ledge and then jump left through the new opening.
v) Keep going left until you reach a room with ledges with pictures on them (These pictures are called hieroglyphics and are an ancient language in Egypt.). You have to jump onto the right pictures to make it to the top. Otherwise they will collapse on you.
Follow the instructions below to make it to the top:
-Jump on the block with a person.
-Jump on the block with an upturn boat and a jagged line.
-Jump on the block with a bird and a staff.
-Jump on the block with an eye and a boat.
Once you have reached the top click on the rope to go up.
vi) Go up and enter a room with two large statues. In the middle of the room there is a tablet with markings on it. The dots on the cups tell you which switch to pull in what order. The switches are found on each column half way up. When a switch is pulled it will make a cup with a number of dots fall. As soon as you pull one, sand will start to fall and begin to rise. Remember the order to pull the switches and do it fast.
Follow the instructions below to achieve the task:
[If you make a mistake pull the reset switch to try again.]
-Pull switch number 1
-Pull switch number 2
-Pull switch number 3
-Pull switch number 4
(Try the order 4-2-3-1 if the above combination doesn’t work.)
Once complete the mummy at the top will open to reveal the Blue jewel. Grab the jewel and exit the room to your left. Climb down the rope then fall down to your right, then climb down another rope to your right. Now exit to your left.
Make your way back to the plane.
5.i) Fly south to Kaya Forests. Jump onto the hut, and jump right onto the trees. Keep going until you see a gold object in the tree. Pick it to get a Gold Nugget. Fall down and walk right until you see a giant shell. Stand next to it and go into your items. Click ‘Use’ on the Opuntia Fruit
The turtle/tortoise will wake up and move over to eat it. Walk over to the small hole in the ground, go to your items and click ‘Use’ on your shovel. You will find an Ebony Elephant and two mysterious ghosts will rise from the hole asking for a Fingo. Now go back to the plane.
ii) Fly north-west back to the Nabooti dot. Walk right to the stalls and talk to the girl wearing blue clothing. Trade your elephant for a Fingo. While you’re here, walk right to the man wearing purple orange clothes. Trade your Gold Nugget for a camera. Now make your way back to the plane.
iii) Fly back to the Kaya Forests and talk to the ghost man again. Say you have found the Fingo. As a reward he will give you a Green Jewel. Now walk back to the plane.
6.i) Fly your plane just above you to Safari. Once there, run all the way right till you reach Big Zeke. Talk to him and ask if he needs help. He will tell you he needs 7 good pictures of different animals.
Follow the instructions below to find the animals:
-There is a Giraffe in the middle next to the tree.
-Left of the Giraffe there is a Zebra next to a stream.
-Left of the Zebra there is a lion in the bushes.
-In the top left-left-hand corner a bird will appear in a tree.
-Right of the Giraffe an Alligator will emerge in the water.
-At the very right an Elephant will appear behind a mound.
-In the very bottom-right-hand corner a Gazelle will appear.
Once you have take the 7 good photos press close and Big Zeke will give you a Mining hat. Go back to your plane.
7. Fly south until you reach Diamond Mines. Once there, put on your Mining Hat. Go over the dirt mound, go right, and then pass the man and the electric fence until you reach a switch board.
Click on the switch between the two lights. This will turn off the electric fence but only for a short time. Your time left will be shown in the bottom left-hand corner.
Run left, go up the dirt mound, jump onto the metal structure, go along it and fall down the gap onto a ledge. Walk along this ledge until you see an opening in the fence. Enter it. If you do not make it in time, then go back a flick the switch again.
ii) Go left until you see some oncoming mine carts. Stand underneath the railings until a mine cart falls of. Jump on and make your way up. Stop underneath the next railings and wait for the cart to fall. Jump up and rung along. Repeat this process until you reach the top. Then enter where the Mine carts come from.
iii) First click the green light to turn it off. Now push the flammable canister right until it stops at a rock. Go back to the green button and turn it on. This should ignite the oil trail left by the canister. When it reaches the canister it should blow destroying the rock in front of it. Turn off the green button again and push the canister to the very end. Go back and press the green button to ignite the oil. This should open up a new passageway. Enter it.
iv) Go right and push the mine cart forward. This should start the mine cart ride. During the ride you need to jump over the spikes and duck when its at the top.
Follow the instructions below to reach the end of the track:
[If you fall of click Try-again.]
-Bend down to avoid hitting your head at the top.
-Jump when its says jump near the bottom of the bend.
-Bend down immediately after.
-Jump when you’re near the bottom again.
-Bend down again.
-Get ready to jump again.
-Bend down.
And then just let it finish. It should take you to the next room.
v) Go right and jump on the platform via the bump in the wall. Jump up again until you are on the jewels. Click on the jewels to view them.
Click and hold onto the magnified glass in the right-hand corner. Move it to one of the jewels to the left until you see a marking on one of them. Hold it over the diamond until it asks if you want to take it. You will have now received the last jewel, the White Jewel. Climb up the rope. Now go to the plane.
8.) Fly north-east back to Nabooti. Go right and enter the Nabooti African Museum again. Go down the bottom and talk to the girl. All you have to do now is put the jewels in the right order.
Follow the instructions below to put the jewels in the right order:
(The gems are placed from bottom to top.)
-Yellow
-Orange
-Blue
-White
-Red
-Green
-Purple
Congratulations. You have finished Nabooti Island!
Big Nate Island Guide

First, to get onto the island, hop into the yellow blimp (located on Main Street of whichever island you’re on right now) and travel to the island named “Big Nate”. When you arive at the Main Street you will be greeted by Big Nate. He will tell you that he is on a search for a time capsule hidden a hundred years ago. Head to your right and enter the shop named “Pop-In Shoppe”, a store run by Nate’s dad. At your left there is a bulletin with some background information on the time capsule. If you go to the top floor, on the green couch there is a comic strip frame. There are nine of these frames hidden around Big Nate island and they all join up to make a comic strip that will help you later in the game.
Go back outside and go to your right. Enter the “Klassic Komix” building, which is full of comics and other cool stuff. Once inside talk to the guy. He is looking for a comic he lost, he will provide you with a comic frame for it. Exit the building. Pass the “Cap’n Salty’s” building, which is the island’s multiplayer room, and then enter the Photo Studio (the large camera), a building run by the “School Picture Guy”. On the right there is a comic frame sitting on a light. Pick it up then go back outside. Now on the right of the “Photo Studio” there is a telegraph pole you can climb. Climb to the the top to obtain another comic frame. Jump back down and go right.
You are now outside the school, where there is a large bell on the top (more information can be found later on in the guide). Head to your right and go inside the school. Inside there is a science lab, some rundown lockers, a detention hall, and a secret room. Go to your right, jump up the stairs and grab the comic frame. Enter the door labeled “Science Lab” on your left. Once inside the room make your way next to the science geek, a boy named Francis. Click on the chemistry set next to him. Turn on the heater to 4, then pour half of the beaker with blue liquid and half with yellow, which will make a greenish color. This will produce an item - ”Stink Bomb”. It will be useful later. Go over to your left towards the Mr. Bones skeleton model and grab the comic frame on top of the planet mobile. Make your way out of the science lab and out of the school.
Climb up the wooden scaffolding on the right of the school. Grab the comic frame on it. Now go right to the Playground.
Climb to the top of the playground and head left so you are on top of the climbing wall. Floating above you is a comic frame, grab it. Go right and enter the ‘Kids Only’ house. Win the “Go To Jail” game to obtain the Peanut Butter Crackers. If you want to you can win at “Table Football” to obtain “Big Nate’s Pratical Jokes” (NOTE: You don’t have to play Table Football, but you do need to win Go To Jail). Go back outside and travel right to reach “Puffin Point”.
Go right and climb up the Lighthouse. On the very top of the light house is a comic frame, grab it. You now have collected all the comic frames. Click on your Inventory, then examine the Big Nate Comic. Arrange them so they spell: “Nine Three Zero Five” in between the strip. This is the order they are in (going from left to right, top first, then the bottom):
Keep going left, left, left, until you reach the Photo Studio building (the large camera). Enter the building. On the left there is the ‘School Picture Guy’, he has a golden scuba suit that he will trade, for a photo. Swap the photo for the suit to obtain a new item – “Scuba Gear”. Now leave the building. Walk left and enter the building “Klassic Komix”. Talk to Gordie (the shopkeeper) again, and tell him you found his comic. He will be so glad that he will let you keep the comic and let you have a “Stale Pack of Gum” as a prize. Exit the building and go right.
Make your way back to Puffin Point, so go right, right, right, right…until you reach it. Head right past the lighthouse and talk to Cap’n Salty. He needs your help to rescue the lobster trap from under the water. Go into your Inventory and put on the scuba gear. Jump off the dock and dive down. Swim all the way to right until you can’t go any futher, then swim down until you reach the lobster trap. Pick it up and wait until your oxygen runs out. Once you are at the start swim up. Talk to Cap’n Salty to obtain two items - ”Lobster “and the “Jet Ski Keys”.
Jump on the skis on your right and ride away. Big Nate will challenge you to see who can get there first. The best way to beat him is to try keep your computer’s mouse as far to the right side as you can and to move farther and gain some distance from him. Once you arrive at the rocks (it’s called “Sealsaw Rock on the Map) jump on the tilting, seesaw-like rock. Push both of the cute seals to the left side of the rock. Now you can jump down and take the scroll. The scroll is the “Map to Capsule”. Ride back to Puffin Point. Climb back up the lighthouse to the light. Go to your Inventory, select the “Lobster” item card, and click “Use” to your lobster to turn the light around. It will scare away the bird at the top of the school bell. Jump off the lighthouse and go left.
Go left to the Playground. The capsule is here but it is guarded by the girls. Go left, enter the school building, and jump up to the second floor. Run left to the lockers and click on one spilling with papers. Enter the locker code found on the comic – 9305. Once the locker empties itself, click on the papers again. You will find the “School Blueprint”. If you examine it you will see that there is a secret room. Now the only way to move the girls is to ring the bell, but the bell is missing its clapper. The bell clapper is hidden in the secret room.
To get to the secret room you have to go through the detention room. To enter the Detention room stand outside the detention room door and chew on the gum by going to your Inventory, selecting the item card “Pack of Stale Gum”, and clicking the “Use” button. The teacher, Mrs. Godfrey, will take you inside. The secret room is through the filing cabinets.
Use the stink bomb to move the teacher. Go to the right and click on the filing cabinets. It will reveal a hidden ladder. Then go down. Once you’re down at the bottom turn on the power by clicking on the power lever. On the right above the work bench is a bronze bell clapper. Jump up and grab it to obtain an item – “Bell Clapper”. Make your way back up the stairs and outside of the school. Go to the top of the school, use the bell clapper, and ring the bell. The girls will now leave their place.
Go to the Playground and stand between the two posts, between the monkey bars and the logs. Open your items and use the Peanut Butter Crackers. The dog will then dig a hole, showing the time capsule hidden underneath. Click on the hole and pull the capsule from it. Click the lock to open it. Watch the dialogue between Big Nate and his friend Jenny, who convinces Nate to use the valuable pearl inside the capsule to save the school even though he doesn’t really want to. When the newspaper (called “The Clam Courier”) appears, click close at the top-right corner of the gamescreen. You will then be confronted by the teacher who will award you with the Big Nate Island medallion!
Congratulations! You’ve completed Big Nate Island’s quest.
Go back outside and go to your right. Enter the “Klassic Komix” building, which is full of comics and other cool stuff. Once inside talk to the guy. He is looking for a comic he lost, he will provide you with a comic frame for it. Exit the building. Pass the “Cap’n Salty’s” building, which is the island’s multiplayer room, and then enter the Photo Studio (the large camera), a building run by the “School Picture Guy”. On the right there is a comic frame sitting on a light. Pick it up then go back outside. Now on the right of the “Photo Studio” there is a telegraph pole you can climb. Climb to the the top to obtain another comic frame. Jump back down and go right.
You are now outside the school, where there is a large bell on the top (more information can be found later on in the guide). Head to your right and go inside the school. Inside there is a science lab, some rundown lockers, a detention hall, and a secret room. Go to your right, jump up the stairs and grab the comic frame. Enter the door labeled “Science Lab” on your left. Once inside the room make your way next to the science geek, a boy named Francis. Click on the chemistry set next to him. Turn on the heater to 4, then pour half of the beaker with blue liquid and half with yellow, which will make a greenish color. This will produce an item - ”Stink Bomb”. It will be useful later. Go over to your left towards the Mr. Bones skeleton model and grab the comic frame on top of the planet mobile. Make your way out of the science lab and out of the school.
Climb up the wooden scaffolding on the right of the school. Grab the comic frame on it. Now go right to the Playground.
Climb to the top of the playground and head left so you are on top of the climbing wall. Floating above you is a comic frame, grab it. Go right and enter the ‘Kids Only’ house. Win the “Go To Jail” game to obtain the Peanut Butter Crackers. If you want to you can win at “Table Football” to obtain “Big Nate’s Pratical Jokes” (NOTE: You don’t have to play Table Football, but you do need to win Go To Jail). Go back outside and travel right to reach “Puffin Point”.
Go right and climb up the Lighthouse. On the very top of the light house is a comic frame, grab it. You now have collected all the comic frames. Click on your Inventory, then examine the Big Nate Comic. Arrange them so they spell: “Nine Three Zero Five” in between the strip. This is the order they are in (going from left to right, top first, then the bottom):
- Uh… excuse me… | Hm?
- I’m new here, and… um… I’m sort of lost. | Ah! Nate Wright at your service, dude! Where do you need to go?
- I’m trying to find the art room. | Art room! Gotcha! Stand here!
- Uh… here? | Right there! And don’t move!
- But… | Klik!
- FOOOMM!
- Well? | You overshot. He reached the nurse’s office.
- Dang! | …Which is probably a good place for him to end up.
Keep going left, left, left, until you reach the Photo Studio building (the large camera). Enter the building. On the left there is the ‘School Picture Guy’, he has a golden scuba suit that he will trade, for a photo. Swap the photo for the suit to obtain a new item – “Scuba Gear”. Now leave the building. Walk left and enter the building “Klassic Komix”. Talk to Gordie (the shopkeeper) again, and tell him you found his comic. He will be so glad that he will let you keep the comic and let you have a “Stale Pack of Gum” as a prize. Exit the building and go right.
Make your way back to Puffin Point, so go right, right, right, right…until you reach it. Head right past the lighthouse and talk to Cap’n Salty. He needs your help to rescue the lobster trap from under the water. Go into your Inventory and put on the scuba gear. Jump off the dock and dive down. Swim all the way to right until you can’t go any futher, then swim down until you reach the lobster trap. Pick it up and wait until your oxygen runs out. Once you are at the start swim up. Talk to Cap’n Salty to obtain two items - ”Lobster “and the “Jet Ski Keys”.
Jump on the skis on your right and ride away. Big Nate will challenge you to see who can get there first. The best way to beat him is to try keep your computer’s mouse as far to the right side as you can and to move farther and gain some distance from him. Once you arrive at the rocks (it’s called “Sealsaw Rock on the Map) jump on the tilting, seesaw-like rock. Push both of the cute seals to the left side of the rock. Now you can jump down and take the scroll. The scroll is the “Map to Capsule”. Ride back to Puffin Point. Climb back up the lighthouse to the light. Go to your Inventory, select the “Lobster” item card, and click “Use” to your lobster to turn the light around. It will scare away the bird at the top of the school bell. Jump off the lighthouse and go left.
Go left to the Playground. The capsule is here but it is guarded by the girls. Go left, enter the school building, and jump up to the second floor. Run left to the lockers and click on one spilling with papers. Enter the locker code found on the comic – 9305. Once the locker empties itself, click on the papers again. You will find the “School Blueprint”. If you examine it you will see that there is a secret room. Now the only way to move the girls is to ring the bell, but the bell is missing its clapper. The bell clapper is hidden in the secret room.
To get to the secret room you have to go through the detention room. To enter the Detention room stand outside the detention room door and chew on the gum by going to your Inventory, selecting the item card “Pack of Stale Gum”, and clicking the “Use” button. The teacher, Mrs. Godfrey, will take you inside. The secret room is through the filing cabinets.
Use the stink bomb to move the teacher. Go to the right and click on the filing cabinets. It will reveal a hidden ladder. Then go down. Once you’re down at the bottom turn on the power by clicking on the power lever. On the right above the work bench is a bronze bell clapper. Jump up and grab it to obtain an item – “Bell Clapper”. Make your way back up the stairs and outside of the school. Go to the top of the school, use the bell clapper, and ring the bell. The girls will now leave their place.
Go to the Playground and stand between the two posts, between the monkey bars and the logs. Open your items and use the Peanut Butter Crackers. The dog will then dig a hole, showing the time capsule hidden underneath. Click on the hole and pull the capsule from it. Click the lock to open it. Watch the dialogue between Big Nate and his friend Jenny, who convinces Nate to use the valuable pearl inside the capsule to save the school even though he doesn’t really want to. When the newspaper (called “The Clam Courier”) appears, click close at the top-right corner of the gamescreen. You will then be confronted by the teacher who will award you with the Big Nate Island medallion!
Congratulations! You’ve completed Big Nate Island’s quest.
Astro-Knights Island Guide

Coordinates
Pewter Moon: 56, 52
An AstroZone store is located on this popular moon. AstroZone repairs and builds custom rocket ships that traverse the galaxy. This store is owned and operated by hospitable aliens.
Jungle Planet: 15, 15
This planet is populated with strange mechanical vegetation and creatures. One of the most ill-tempered inhabitants is the Atomic Phoenix.
Fire Planet: 83, 20
This planet is inhabited by hot-tempered creatures such as the mechanized Dragotank. The Dragotank is said to be impenetrable except for his mouth, which is usually spewing flames.
Black Hole: 84, 47
A dangerous and fatal hole in outer space which will cause you to be teleported near Pewter Moon if you get sucked in. This is also where you should lure the space sharks to eliminate them.
Ice Planet: 73, 83
This planet is surrounded by dangerous mechanical Space Sharks. Space Sharks are virtually indestructable, but even they cannot withstand the pull of a black hole.
Crystal Gate : 11, 82
When four knights of the Quest are gathered the Chosen One may pull the key from the stone.
Introduction
Welcome to Astro-Knights Island. This is home to the peaceful town of Arturus – always from above to shine.
Unfortunatly the peaceful town is no longer peaceful. After some tragic events with a dark sorcerer, Mordred, the town has fallen to ruins and the princess was abducted by aliens. Three brave knights were sent out to save her, but they never returned. It is now up to you to rescue her. Good luck.
Welcome to Arturus!
The star city, always from above to shine. The first building on the left is the House of Mordred, now known as the Museum of Mordred. It contains all the wonderful things Mordred the dark sorcerer used while this he was staying at Arturus. Next is the Space Shuttle Fountain – dedicated to Mordred who brought technology to the town (also contains a secret passageway to a hidden cult).
Next is the Planetarium – Filled with Mordred’s amazing technology in star gazing, unfortunately none of it works besides the telescope. And last but not least is the Crop Circle Inn - a multiplayer room where you can eat, rest, play and chat with your friends. We hope you enjoy your stay at Arturus.
Museum of Mordred:
After landing in the town of Arturus, make your way right past the first building and to a space craft fountain. Notice on the top water ring there is something gleaming. It is a coin. Walk over it to pick it up.
Now go back to the building you passed and enter it. This building was formerly the house of Mordred – now known as Mordred’s Museum. Unfortunately the manager won’t let you through without paying. Talk to him to obtain a Museum Pamphlet. Go into your items and select use on the Golden Coin.
Now click on the books to the right of the manager. He doesn’t want you touching them so he will give you a Library Book Slip instead. As un-exciting as it may seem, the book slip is a clue to a hidden dungeon. Notice the underlined McM.
Castle Library and Dungeon:
Go outside and run all the way to the right until you get the option ‘Go Right’. Go right again until you get to the Castle of Arturus. Move a little right and enter the castle through a large wooden door.
Once inside go right and enter the smaller door. You are now in the castle’s library (a slightly destroyed library). Inside there are two books you can grab; The Mystical Weapons of Arturus (far left in the fiction area), and The Life of Mordred: A Cautionary Tale (non-fiction area on a stand). Both these books are great reads; just don’t touch the other books, the librarian doesn’t like it.
Go into the Non-Fiction area. Notice the golden plaques with letters on them. Click on the strangely colored brick behind the one with “McM“. A secret passageway to the castle dungeon will open. Click on this entrance to enter it.
You are now in a gloomy room. Walk over the moldy cheese to the right on the ground to pick it up. The item “Moldy Cheese” should now be in your inventory. Go right and click on the handle (lever) on the wall. This will open a small grate to the right, leading to a passage way. Inside is a strange robotic monster. Click on him and a bunch of binary numbers will pop up – this can be translated into the word “Bard“. Now head back up the stairs.
Maid’s Room and Royal Chamber:
Once back up in the library you will be confronted by a couple of guards and the unhappy librarian who is now very unhappy. Escape them and run out the door to the right. You will be back at the main castle.
Head left and enter the small door by the stairs. You will enter into a small bedroom with a little mechanical mouse scuttling on the floor and a maid. Walk right into the middle of the room and click on your items. Click on the moldy cheese and select “Use“. The mechanical mouse will eat the cheese and you catch him. (The mouse will now be in your inventory.)
Walk right; notice the letter sitting on the chest. Walk over it to pick it up. It is a secret message and it will go into your items. Go back outside to the main castle building.
Head up the stairs and enter the door at the top. This is the Royal Chamber. The King and Queen promise to knight you if you can find the stolen Princess. Ask the Queen if there’s anything else that might help. She will give you the co-ordinates to all the missing knights. (”Coordinates” will go into your inventory.) It might not make sense for now, but it will soon.
Ye Olde Rumour Mille:
Climb back down the stairs and make your way outside. Once outside go to the very right. Click to “Go right” and then right again until you reach a man with a shovel. Talk to the man with a shovel to receive a “Bag of Manure”, which will enter your inventory. Next jump over the two hay bales and walk up the hill and then enter the windmill.
Climb up on the hay bales, jump on the cog wheels, then jump over onto the platform. From here jump onto the rope hanging. Notice this lifts up the rod, stopping the wheels from turning. From where you are, slide down and fall onto the platform where a strange, darkly-dressed girl is standing. She will ask you for a secret in return for hers. She will then hand you a note with 3 symbols on it - a moon, a planet, and a star. This is the new password to the clan’s secret entrance.
Fall down and go outside. Walk to the right until you reach the edge. On top of the turning wheel there is a coil of rope. Jump on top of it to recieve it (”Coil of Rope” should go to your inventory). Jump back down and stand under the sign that reads “Ye Olde Rumour Mille”. Jump on top of it and then jump onto one of old mill’s turbines. Notice it will start moving. When this moves around it opens a secret access point on the roof.
Keep spinning the windmill round and round until the glass cover on the top is open. (Tip: It is a lot easier to stand closer to the center of the turning blades so you can easily jump onto the next one.)
Once the roof is open enter it. Inside, there is a hovercraft. It does not work because it is out of power. Open your items and select “Use” on the Bag of Manure. Once that’s done, the hovercraft will fly out the roof and will land a little above the mud outside. Climb up the haystacks and exit the mill.
Princess’s Tower:
Once outside, head left and go past the man with the shovel and go left and left again until you reach the castle. Go left and stand in front of the massive oak door. From here jump onto the windowsill and then onto the platform with a giant bow and arrow on it. Stand in front of it, go into your items and select “Use” on the Coil of Rope. This will attach a long piece of rope to the arrow.
Point the arrow to the left and aim to the top-left. This door on the left leads into the princess’s tower. (Tip: Move the arrow so the tip of the point just touches the window’s outside shadow.) Once fired it should hit and stay into the door creating a walkway from where you are. If you manage to miss the door keep lowering or raising the arrow until you hit it. Walk across the rope and enter the doorway at the end.
Once inside, walk to the far left where a chest filled with parchment sits. Notice the brown paper sticking out. Walk over it to pick it up. It is a note from the Princess explaining the whereabouts of Mordred’s Secrets. Read it, then make your way back outside.
Secret Sanctum:
Go left from the castle until you reach Main Street. Head to the center, where the Space Shuttle Fountain is. Walk into the middle of the fountain and click on the plaque on the wall with space symbols. Remember the Cosmic Symbols the strange girl gave to you? Click the symbols in this order:
Down below there are 5 people in purple hoods and cloaks. Talk to the boy with bad acne on the far right. He will give you a “Small Key”, which will go into your items. Once you receive this key, make your way back up the rope on the left and out of the secret room.
Mordred’s Hideout and your Fuel Rod:
When you’re out on Main Street again, walk left and enter Mordred’s Museum. Go to the top floor and click under the bed. You will find a missing page containing the location of a nearby moon.
Head back outside and go right and keep going right until you the place called “Ye Olde Rumour Mille” on your Map. Move a bit right again and jump onto the two hay bales there. Slowly move between the two of bales, causing you to fall between them. Once you have done that push the hay out of the way to reveal a trapdoor. It is locked. Now go into your items and select “Use” on the Small Key. You will open the trapdoor. Click on it to go inside.
Slide down the rope to enter the wonderful hideaway where Mordred made his creations. Notice the strange mechanical owl. Walk up to it and click to cause it to fly outside. Go back up the rope to exit Mordred’s hideout. The owl should be hovering just to the right of the hay. Hop onto the ground and go into your items. Select “Release” on the Mechanical Mouse. The owl will swoop down and eat it. It is now your friend and will follow you. Notice that by clicking on the bird, you can control where it will fly. (The owl’s name is Merlin, by the way.)
Now head back down into Mordred’s hideaway. Walk left and pick up the book on the chair. You will receive Mordred’s Journal. Walk as far left as possible, until you see a rocky wall block your path. Push against the wall, causing it to bend and shake. Push against the wall for a few seconds to break it. Go along the passageway and crawl through the small hole there.
You will now be behind the bars in the Castle Dungeon. The robot monster inside the cell with you will notice you and will explode (self-destruct), causing his fuel rod to fly up and fall behind the bars. Walk up to the bars, click on the bird (Merlin) and then click on the green rod. The owl will fly down and pick it up for you. You will now receive a Fuel Rod.
Excalibur, the UFO:
Crawl back through the hole and climb back up outside to where the hay bales are. Jump over them and head right until you get to the edge of the hill. The red hovercraft you found earlier will be waiting for you there. Hop on top of it and steer it with your cursor (mouse). Fly all the way to the right until you find a slightly damaged space craft, or UFO (unidentified flying object). It is called Excalibur. Click on it to access it.
This will bring up some controls with dials and a broken fuel rod. In the bottom left corner drag the fuel rod to where the broken one is. Because there isn’t much fuel, we have to travel somewhere close. Remember the location of the nearby moon on the lost page? Turn the left dial to 56, and the right dial to 52. Then click on “Launch”.
Pewter Moon:
You have just arrived at Pewter Moon, but due to the fact that the fuel rod is now depleted, you crashed Excalibur, now you have to find a new ship. On this planet there is little gravity, so you are able to jump much higher than normal. Head over to the right and jump up on the moving platform and enter the doors of the AstroZone building.
The boss, who looks like a green alien, is inside. Ask him how you can get off this planet, and you will be given permission to create your own ship. Wait for your character to reply, “Great! Thanks!”, then go back outside and click on the floating holopad console to the left. The console will pop up and you will be able to create your very own custom-designed rocket ship!
You can customize your wings, body, door, window, engine and guns. You can select each part and change their design even their colors! Different combinations of parts will change the Speed and Shield levels. (Tip: Do a bit more Speed then Shield.)
When you’re finished, click “Done”. You will then be taken back outside with your ship waiting on the pad next to you. Enter it to finally begin your rescue mission. Once inside your spaceship, click on “Launch” to begin flying. The next three planets can be done in any order. You can also click on the screen above the Launch lever to read about each of the planets to help you decide.
Jungle Planet:
You are now in control of your spaceship. Let’s first fly in a north-west direction to the Mechanical Jungle Planet. The coordinates are 15, 15. Keep in mind that the area around the planet is inhabited by space aliens. They will fire at your ship so watch out. Try your best to dodge them!
Once you arrive at the planet, click on it to land. When you’ve landed, exit your spaceship. You should be now on a platform with your ship next to you. Fall off the platform to the right. Keep falling down until you reach the ground. Now make your way to the center of the ground. In the middle will be a small platform with the “Laser Lance” weapon covered with a beam of light. Walk over it to pick it up.
Now go left and jump on a flower. They will spring you up in the air. Jump onto the one on the right, then left, then left again until you reach the platform with you spaceship on it again. Notice the strange bug on the roof. There are more along the way to the right, and they will zap you if you get too close. Wait for the swinging platform to get near, then jump. (Tip: When the swinging platform get to the end then starts falling back then jump, this will cause you to land perfectly on the next platform.) Remember to watch out for those zapping bugs, which may knock you off. Once you have reached the end, go right.
Mother Phoenix:
In the next room there is a knight dressed in shining green armor. His name is Sir Cador. If you talk to him, he will tell you to save the princess from the cage to the right. To do so you should climb up the rope. You will then have to pass by four mechanical eggs that may knock you back if you do it incorrectly. Directions on passing them so that you can get to the cage:
Avoid the flying bugs, or you can shoot them with short little shots. Short laser shots can be made simply by clicking over and over again. Watch out for electric clouds. They’re the dark black clouds that will shoot out with lightning every now and then. They can be harmful, so simply move out of their way. After a while the Mother Phoenix will arrive.
When her mouth is open, shoot at her mouth. If you aimed right, her body will start flashing red, indicating it had been defeated. You’ll have to do this three times to beat it. If you missed, it’s usually a good idea to stay away and wait for her to fire her missiles and leave. Wait for the Mother Phoenix to come back, and she will either charge at you from the left or the right.
If she comes from behind you, quickly avoid her by staying at the very bottom or very top of the screen, opposite of the area she is in. It is impossible to shoot at her when she is behind you. Simply wait for her to pass, and come back facing you. (May take a few times.)
A good tip is for you to stay at the bottom of the screen. It can’t hit you there often. Once you win, the green knight (Sir Cador) will join you. When you are back inside your rocket ship, click “Launch”. Then press the “Teleport Home” button, which is right above the area it shows what coordinates you are at.
Fire Planet:
Fly in a north-east direction to the Fire Planet. Its coordinates are 83, 20. Along the way there is a black hole, which you should avoid by going around it. The area around the planet is also inhabited by space aliens. They will fire at your ship, so be careful. Once you see this dark red planet, click on it to land. Then exit your spaceship.
Below you is lava, or really hot water. If you stand in it, you will be teleported back to your starting point beside the ship. The hard thing about this part is timing. Make sure that before you jump to the next platform that it is close enough for you to land on. (Tip: When you get to the second last platform, it is easier to jump on the one before, wait for it to get to the bottom then do a huge jump to the last platform.) After you get to the last platform, enter the volcano.
The next part can be quite annoying for some people. It requires you to be patient until the moving gas stops and you’re able to move and hide. If you aren’t careful, it will send you all the way to the top of the volcano. Once you reach the end you don’t have to worry about it. Now go through the passage.
Halfway through this is a strange creature that whacks and rolls at you. Jump over it when it rolls. Keep going left until you meet the red knight. His name is Sir Pelleas. Ask him what you should do and he will give you an Ice Arrow. Continue forward and get ready to fight a dragon – it is known to Poptropicans as the ”Dragotank”.
Dragotank:
When you enter the room jump onto the hanging chains, then jump across them until you reach the other side. Jump down, dodge the spicky tail and then walk under the switch. Jump up and click on it. This will cause him to temporarily shut down. Jump out to the side where you started and fire an Ice Arrow in his mouth. Do this three times to defeat him. (Tip: When he starts to get angry after you shoot him, jump on the chains, dodge the falling spikes and get to the other side to do it again.)
Once you defeat the Dragotank, the red knight (Sir Pelleas) will join you in your mission. Back at your spaceship again, press “Launch“. Then press the “Teleport Home” button.
Ice Planet:
Start flying in a south-east direction. The coordinates to the Ice Planet are 73, 83. The only problem about getting to the planet is that it’s protected by three space sharks. All you have to do is get them to all follow you by shooting at all of them. Do this by getting near them (note: Do NOT touch them!), then click once for each shark to shoot something. This will get their attention. Once they are all following you lure them into the black hole which is north to the right a bit at the coordinates 84, 47.
If this is too hard, just attract them one by one. (Note: Make sure you keep them in view when you fly to the black hole because they can stop following you.)Be extremely careful not to get sucked into the black hole yourself, because you will just be teleported back near Pewter Moon without having done anything to the sharks. To get the sharks sucked into the black hole without pulling yourself in instead, simply fly around the hole and avoiding any parts of it at all costs. You will know that a shark gets sucked in when you see the yellow scrolling message at the bottom of the screen telling you that they have been eliminated.
Once you land, exit the ship. You are now standing on a platform of ice. Below you is icy cold water that will freeze you if you land in it, causing you to teleport back next to the ship. Jump onto the floating platform to the left, and keep moving left until you reach the end. (Tip: Make a giant leap to the center, and watch out for the jumping helmet fish, which can knock you into the cold water.) Once you reach the end, go right.
Quickly climb up the mountain and watch out for the gigantic falling snowballs. At the very top is the blue knight. His name is Sir Gawain. Ask him if you can help, and you will receive a Force Shield Necklace.
Tigercopter:
You will have to defeat a Tigercopter, which is a tiger and helicopter combined into one creature. Use your force field to hit the snowballs back at the Tigercopter. Watch out for when it falls, because it will destroy your force field for a certain time. After he falls, a large snowball shoots out that will freeze you, so jump over it. You must repeat this three times in order for it to be defeated.
Once you have destroyed it, the blue knight will come with you. You will return to your spaceship. Click on “Launch”, then click on the ”Teleport Home” button.
Crystal Gate:
Once all 3 knights have been rescued and reunited, you will be able to visit a legendary asteroid known as the Crystal Gate. Start flying in a western direction. Its coordinates are 11, 82. Beware though, because this planet is surrounded by asteroids. Be sure to avoid bumping into the asteroids!
Once you land, exit the space craft. Climb up the crystal mountain to the top where the 3 knights (Sir Cador, Sir Pelleas, and Sir Gawain) are waiting. You are the fourth knight! Click on the sword. This will cause a small portal to form, which will suck in the sword. Enter it.
You will land on top of a castle. It is Binary Bard’s Fortress. Go down the bottom and talk to the princess. She will ask for your 3 weapons. Once you have given them to her, the princess will turn into Binary Bard. It turns out that “she” was a fake and that the evil Binary Bard has tricked you! He will disappear.
Click on the strange wall next to you. A puzzle door will appear, which you must solve in order to get through to the other side. The picture At The Bottom Of The Screen Will Show You How To Solve The Puzzle.
Defeating Mordred:
In the first round, you will be using Merlin, the owl. Fly him over and pick up the explosive bombs Mordred drops. Pick them up and drop them on the green orb on top of Mordred’s robot. Make sure you drop them only while they are flashing red, otherwise it won’t work. Also, avoid the flying bombs he throws, which lower Merlin’s health. Do this two times. Once complete, Mordred will destroy Merlin.
Now it’s your turn! Lure Mordred to the center, just underneath the princess. Then jump on him from under him and onto the princess’s platform. From here jump on the chandeliers on either the left or right. Wait for him to go underneath and he should fire a red laser beam at it, causing it to fall on him. Do this for both sides (if you did it on the left the first time, do it on the right, and vice versa). Once this is done, Mordred will be no more.
Your Reward:
You will then go with the real Princess back to Poptropica be knighted by the King and Queen. The Princess will have had Merlin repaired, and you can find the owl flapping around in the Royal Chamber. You’ll receive the Astro-Knights Island medallion and 100 credits to spend at the Poptropica Store.
To show that you have received your knighthood, the King will call you by your knight name just before you get the Island Medallion. If your character is a boy, it will be “Sir”; for girls, it is “Lady”. This title will then be followed by your Poptropican last name. (For example, if your Poptropican name is Scary Tomato, your last name would be Tomato.) Since Scary Tomato’s character is a boy, he would be “Sir Tomato”. Please bear in mind that this does not apply to your name in multiplayer rooms.
Also, if you look back at the Space Shuttle Fountain, you’ll notice that Mordred’s green orb has been placed there. Power has been restored to Arturus, and the town is saved. Congratulations!
Pewter Moon: 56, 52
An AstroZone store is located on this popular moon. AstroZone repairs and builds custom rocket ships that traverse the galaxy. This store is owned and operated by hospitable aliens.
Jungle Planet: 15, 15
This planet is populated with strange mechanical vegetation and creatures. One of the most ill-tempered inhabitants is the Atomic Phoenix.
Fire Planet: 83, 20
This planet is inhabited by hot-tempered creatures such as the mechanized Dragotank. The Dragotank is said to be impenetrable except for his mouth, which is usually spewing flames.
Black Hole: 84, 47
A dangerous and fatal hole in outer space which will cause you to be teleported near Pewter Moon if you get sucked in. This is also where you should lure the space sharks to eliminate them.
Ice Planet: 73, 83
This planet is surrounded by dangerous mechanical Space Sharks. Space Sharks are virtually indestructable, but even they cannot withstand the pull of a black hole.
Crystal Gate : 11, 82
When four knights of the Quest are gathered the Chosen One may pull the key from the stone.
Introduction
Welcome to Astro-Knights Island. This is home to the peaceful town of Arturus – always from above to shine.
Unfortunatly the peaceful town is no longer peaceful. After some tragic events with a dark sorcerer, Mordred, the town has fallen to ruins and the princess was abducted by aliens. Three brave knights were sent out to save her, but they never returned. It is now up to you to rescue her. Good luck.
Welcome to Arturus!
The star city, always from above to shine. The first building on the left is the House of Mordred, now known as the Museum of Mordred. It contains all the wonderful things Mordred the dark sorcerer used while this he was staying at Arturus. Next is the Space Shuttle Fountain – dedicated to Mordred who brought technology to the town (also contains a secret passageway to a hidden cult).
Next is the Planetarium – Filled with Mordred’s amazing technology in star gazing, unfortunately none of it works besides the telescope. And last but not least is the Crop Circle Inn - a multiplayer room where you can eat, rest, play and chat with your friends. We hope you enjoy your stay at Arturus.
Museum of Mordred:
After landing in the town of Arturus, make your way right past the first building and to a space craft fountain. Notice on the top water ring there is something gleaming. It is a coin. Walk over it to pick it up.
Now go back to the building you passed and enter it. This building was formerly the house of Mordred – now known as Mordred’s Museum. Unfortunately the manager won’t let you through without paying. Talk to him to obtain a Museum Pamphlet. Go into your items and select use on the Golden Coin.
Now click on the books to the right of the manager. He doesn’t want you touching them so he will give you a Library Book Slip instead. As un-exciting as it may seem, the book slip is a clue to a hidden dungeon. Notice the underlined McM.
Castle Library and Dungeon:
Go outside and run all the way to the right until you get the option ‘Go Right’. Go right again until you get to the Castle of Arturus. Move a little right and enter the castle through a large wooden door.
Once inside go right and enter the smaller door. You are now in the castle’s library (a slightly destroyed library). Inside there are two books you can grab; The Mystical Weapons of Arturus (far left in the fiction area), and The Life of Mordred: A Cautionary Tale (non-fiction area on a stand). Both these books are great reads; just don’t touch the other books, the librarian doesn’t like it.
Go into the Non-Fiction area. Notice the golden plaques with letters on them. Click on the strangely colored brick behind the one with “McM“. A secret passageway to the castle dungeon will open. Click on this entrance to enter it.
You are now in a gloomy room. Walk over the moldy cheese to the right on the ground to pick it up. The item “Moldy Cheese” should now be in your inventory. Go right and click on the handle (lever) on the wall. This will open a small grate to the right, leading to a passage way. Inside is a strange robotic monster. Click on him and a bunch of binary numbers will pop up – this can be translated into the word “Bard“. Now head back up the stairs.
Maid’s Room and Royal Chamber:
Once back up in the library you will be confronted by a couple of guards and the unhappy librarian who is now very unhappy. Escape them and run out the door to the right. You will be back at the main castle.
Head left and enter the small door by the stairs. You will enter into a small bedroom with a little mechanical mouse scuttling on the floor and a maid. Walk right into the middle of the room and click on your items. Click on the moldy cheese and select “Use“. The mechanical mouse will eat the cheese and you catch him. (The mouse will now be in your inventory.)
Walk right; notice the letter sitting on the chest. Walk over it to pick it up. It is a secret message and it will go into your items. Go back outside to the main castle building.
Head up the stairs and enter the door at the top. This is the Royal Chamber. The King and Queen promise to knight you if you can find the stolen Princess. Ask the Queen if there’s anything else that might help. She will give you the co-ordinates to all the missing knights. (”Coordinates” will go into your inventory.) It might not make sense for now, but it will soon.
Ye Olde Rumour Mille:
Climb back down the stairs and make your way outside. Once outside go to the very right. Click to “Go right” and then right again until you reach a man with a shovel. Talk to the man with a shovel to receive a “Bag of Manure”, which will enter your inventory. Next jump over the two hay bales and walk up the hill and then enter the windmill.
Climb up on the hay bales, jump on the cog wheels, then jump over onto the platform. From here jump onto the rope hanging. Notice this lifts up the rod, stopping the wheels from turning. From where you are, slide down and fall onto the platform where a strange, darkly-dressed girl is standing. She will ask you for a secret in return for hers. She will then hand you a note with 3 symbols on it - a moon, a planet, and a star. This is the new password to the clan’s secret entrance.
Fall down and go outside. Walk to the right until you reach the edge. On top of the turning wheel there is a coil of rope. Jump on top of it to recieve it (”Coil of Rope” should go to your inventory). Jump back down and stand under the sign that reads “Ye Olde Rumour Mille”. Jump on top of it and then jump onto one of old mill’s turbines. Notice it will start moving. When this moves around it opens a secret access point on the roof.
Keep spinning the windmill round and round until the glass cover on the top is open. (Tip: It is a lot easier to stand closer to the center of the turning blades so you can easily jump onto the next one.)
Once the roof is open enter it. Inside, there is a hovercraft. It does not work because it is out of power. Open your items and select “Use” on the Bag of Manure. Once that’s done, the hovercraft will fly out the roof and will land a little above the mud outside. Climb up the haystacks and exit the mill.
Princess’s Tower:
Once outside, head left and go past the man with the shovel and go left and left again until you reach the castle. Go left and stand in front of the massive oak door. From here jump onto the windowsill and then onto the platform with a giant bow and arrow on it. Stand in front of it, go into your items and select “Use” on the Coil of Rope. This will attach a long piece of rope to the arrow.
Point the arrow to the left and aim to the top-left. This door on the left leads into the princess’s tower. (Tip: Move the arrow so the tip of the point just touches the window’s outside shadow.) Once fired it should hit and stay into the door creating a walkway from where you are. If you manage to miss the door keep lowering or raising the arrow until you hit it. Walk across the rope and enter the doorway at the end.
Once inside, walk to the far left where a chest filled with parchment sits. Notice the brown paper sticking out. Walk over it to pick it up. It is a note from the Princess explaining the whereabouts of Mordred’s Secrets. Read it, then make your way back outside.
Secret Sanctum:
Go left from the castle until you reach Main Street. Head to the center, where the Space Shuttle Fountain is. Walk into the middle of the fountain and click on the plaque on the wall with space symbols. Remember the Cosmic Symbols the strange girl gave to you? Click the symbols in this order:
- Crescent Moon (looks like a banana)
- Planet With Rings
- 5-Pointed Star
- Sun (in the middle of the plaque)
Down below there are 5 people in purple hoods and cloaks. Talk to the boy with bad acne on the far right. He will give you a “Small Key”, which will go into your items. Once you receive this key, make your way back up the rope on the left and out of the secret room.
Mordred’s Hideout and your Fuel Rod:
When you’re out on Main Street again, walk left and enter Mordred’s Museum. Go to the top floor and click under the bed. You will find a missing page containing the location of a nearby moon.
Head back outside and go right and keep going right until you the place called “Ye Olde Rumour Mille” on your Map. Move a bit right again and jump onto the two hay bales there. Slowly move between the two of bales, causing you to fall between them. Once you have done that push the hay out of the way to reveal a trapdoor. It is locked. Now go into your items and select “Use” on the Small Key. You will open the trapdoor. Click on it to go inside.
Slide down the rope to enter the wonderful hideaway where Mordred made his creations. Notice the strange mechanical owl. Walk up to it and click to cause it to fly outside. Go back up the rope to exit Mordred’s hideout. The owl should be hovering just to the right of the hay. Hop onto the ground and go into your items. Select “Release” on the Mechanical Mouse. The owl will swoop down and eat it. It is now your friend and will follow you. Notice that by clicking on the bird, you can control where it will fly. (The owl’s name is Merlin, by the way.)
Now head back down into Mordred’s hideaway. Walk left and pick up the book on the chair. You will receive Mordred’s Journal. Walk as far left as possible, until you see a rocky wall block your path. Push against the wall, causing it to bend and shake. Push against the wall for a few seconds to break it. Go along the passageway and crawl through the small hole there.
You will now be behind the bars in the Castle Dungeon. The robot monster inside the cell with you will notice you and will explode (self-destruct), causing his fuel rod to fly up and fall behind the bars. Walk up to the bars, click on the bird (Merlin) and then click on the green rod. The owl will fly down and pick it up for you. You will now receive a Fuel Rod.
Excalibur, the UFO:
Crawl back through the hole and climb back up outside to where the hay bales are. Jump over them and head right until you get to the edge of the hill. The red hovercraft you found earlier will be waiting for you there. Hop on top of it and steer it with your cursor (mouse). Fly all the way to the right until you find a slightly damaged space craft, or UFO (unidentified flying object). It is called Excalibur. Click on it to access it.
This will bring up some controls with dials and a broken fuel rod. In the bottom left corner drag the fuel rod to where the broken one is. Because there isn’t much fuel, we have to travel somewhere close. Remember the location of the nearby moon on the lost page? Turn the left dial to 56, and the right dial to 52. Then click on “Launch”.
Pewter Moon:
You have just arrived at Pewter Moon, but due to the fact that the fuel rod is now depleted, you crashed Excalibur, now you have to find a new ship. On this planet there is little gravity, so you are able to jump much higher than normal. Head over to the right and jump up on the moving platform and enter the doors of the AstroZone building.
The boss, who looks like a green alien, is inside. Ask him how you can get off this planet, and you will be given permission to create your own ship. Wait for your character to reply, “Great! Thanks!”, then go back outside and click on the floating holopad console to the left. The console will pop up and you will be able to create your very own custom-designed rocket ship!
You can customize your wings, body, door, window, engine and guns. You can select each part and change their design even their colors! Different combinations of parts will change the Speed and Shield levels. (Tip: Do a bit more Speed then Shield.)
When you’re finished, click “Done”. You will then be taken back outside with your ship waiting on the pad next to you. Enter it to finally begin your rescue mission. Once inside your spaceship, click on “Launch” to begin flying. The next three planets can be done in any order. You can also click on the screen above the Launch lever to read about each of the planets to help you decide.
Jungle Planet:
You are now in control of your spaceship. Let’s first fly in a north-west direction to the Mechanical Jungle Planet. The coordinates are 15, 15. Keep in mind that the area around the planet is inhabited by space aliens. They will fire at your ship so watch out. Try your best to dodge them!
Once you arrive at the planet, click on it to land. When you’ve landed, exit your spaceship. You should be now on a platform with your ship next to you. Fall off the platform to the right. Keep falling down until you reach the ground. Now make your way to the center of the ground. In the middle will be a small platform with the “Laser Lance” weapon covered with a beam of light. Walk over it to pick it up.
Now go left and jump on a flower. They will spring you up in the air. Jump onto the one on the right, then left, then left again until you reach the platform with you spaceship on it again. Notice the strange bug on the roof. There are more along the way to the right, and they will zap you if you get too close. Wait for the swinging platform to get near, then jump. (Tip: When the swinging platform get to the end then starts falling back then jump, this will cause you to land perfectly on the next platform.) Remember to watch out for those zapping bugs, which may knock you off. Once you have reached the end, go right.
Mother Phoenix:
In the next room there is a knight dressed in shining green armor. His name is Sir Cador. If you talk to him, he will tell you to save the princess from the cage to the right. To do so you should climb up the rope. You will then have to pass by four mechanical eggs that may knock you back if you do it incorrectly. Directions on passing them so that you can get to the cage:
- Wait until the first egg opens, then jump on it.
- Now wait on here until the second egg opens, then jump on the that.
- Now on this second egg, as soon as the third egg opens, jump immediately because that egg will open fast.
- Nowquickly jump onto the last one and jump onto the cage with a unicorn in it.
- Click on the cage to open it and again. Doing so will cause the Mother Phoenix to come. Ready to fight?
Avoid the flying bugs, or you can shoot them with short little shots. Short laser shots can be made simply by clicking over and over again. Watch out for electric clouds. They’re the dark black clouds that will shoot out with lightning every now and then. They can be harmful, so simply move out of their way. After a while the Mother Phoenix will arrive.
When her mouth is open, shoot at her mouth. If you aimed right, her body will start flashing red, indicating it had been defeated. You’ll have to do this three times to beat it. If you missed, it’s usually a good idea to stay away and wait for her to fire her missiles and leave. Wait for the Mother Phoenix to come back, and she will either charge at you from the left or the right.
If she comes from behind you, quickly avoid her by staying at the very bottom or very top of the screen, opposite of the area she is in. It is impossible to shoot at her when she is behind you. Simply wait for her to pass, and come back facing you. (May take a few times.)
A good tip is for you to stay at the bottom of the screen. It can’t hit you there often. Once you win, the green knight (Sir Cador) will join you. When you are back inside your rocket ship, click “Launch”. Then press the “Teleport Home” button, which is right above the area it shows what coordinates you are at.
Fire Planet:
Fly in a north-east direction to the Fire Planet. Its coordinates are 83, 20. Along the way there is a black hole, which you should avoid by going around it. The area around the planet is also inhabited by space aliens. They will fire at your ship, so be careful. Once you see this dark red planet, click on it to land. Then exit your spaceship.
Below you is lava, or really hot water. If you stand in it, you will be teleported back to your starting point beside the ship. The hard thing about this part is timing. Make sure that before you jump to the next platform that it is close enough for you to land on. (Tip: When you get to the second last platform, it is easier to jump on the one before, wait for it to get to the bottom then do a huge jump to the last platform.) After you get to the last platform, enter the volcano.
The next part can be quite annoying for some people. It requires you to be patient until the moving gas stops and you’re able to move and hide. If you aren’t careful, it will send you all the way to the top of the volcano. Once you reach the end you don’t have to worry about it. Now go through the passage.
Halfway through this is a strange creature that whacks and rolls at you. Jump over it when it rolls. Keep going left until you meet the red knight. His name is Sir Pelleas. Ask him what you should do and he will give you an Ice Arrow. Continue forward and get ready to fight a dragon – it is known to Poptropicans as the ”Dragotank”.
Dragotank:
When you enter the room jump onto the hanging chains, then jump across them until you reach the other side. Jump down, dodge the spicky tail and then walk under the switch. Jump up and click on it. This will cause him to temporarily shut down. Jump out to the side where you started and fire an Ice Arrow in his mouth. Do this three times to defeat him. (Tip: When he starts to get angry after you shoot him, jump on the chains, dodge the falling spikes and get to the other side to do it again.)
Once you defeat the Dragotank, the red knight (Sir Pelleas) will join you in your mission. Back at your spaceship again, press “Launch“. Then press the “Teleport Home” button.
Ice Planet:
Start flying in a south-east direction. The coordinates to the Ice Planet are 73, 83. The only problem about getting to the planet is that it’s protected by three space sharks. All you have to do is get them to all follow you by shooting at all of them. Do this by getting near them (note: Do NOT touch them!), then click once for each shark to shoot something. This will get their attention. Once they are all following you lure them into the black hole which is north to the right a bit at the coordinates 84, 47.
If this is too hard, just attract them one by one. (Note: Make sure you keep them in view when you fly to the black hole because they can stop following you.)Be extremely careful not to get sucked into the black hole yourself, because you will just be teleported back near Pewter Moon without having done anything to the sharks. To get the sharks sucked into the black hole without pulling yourself in instead, simply fly around the hole and avoiding any parts of it at all costs. You will know that a shark gets sucked in when you see the yellow scrolling message at the bottom of the screen telling you that they have been eliminated.
Once you land, exit the ship. You are now standing on a platform of ice. Below you is icy cold water that will freeze you if you land in it, causing you to teleport back next to the ship. Jump onto the floating platform to the left, and keep moving left until you reach the end. (Tip: Make a giant leap to the center, and watch out for the jumping helmet fish, which can knock you into the cold water.) Once you reach the end, go right.
Quickly climb up the mountain and watch out for the gigantic falling snowballs. At the very top is the blue knight. His name is Sir Gawain. Ask him if you can help, and you will receive a Force Shield Necklace.
Tigercopter:
You will have to defeat a Tigercopter, which is a tiger and helicopter combined into one creature. Use your force field to hit the snowballs back at the Tigercopter. Watch out for when it falls, because it will destroy your force field for a certain time. After he falls, a large snowball shoots out that will freeze you, so jump over it. You must repeat this three times in order for it to be defeated.
Once you have destroyed it, the blue knight will come with you. You will return to your spaceship. Click on “Launch”, then click on the ”Teleport Home” button.
Crystal Gate:
Once all 3 knights have been rescued and reunited, you will be able to visit a legendary asteroid known as the Crystal Gate. Start flying in a western direction. Its coordinates are 11, 82. Beware though, because this planet is surrounded by asteroids. Be sure to avoid bumping into the asteroids!
Once you land, exit the space craft. Climb up the crystal mountain to the top where the 3 knights (Sir Cador, Sir Pelleas, and Sir Gawain) are waiting. You are the fourth knight! Click on the sword. This will cause a small portal to form, which will suck in the sword. Enter it.
You will land on top of a castle. It is Binary Bard’s Fortress. Go down the bottom and talk to the princess. She will ask for your 3 weapons. Once you have given them to her, the princess will turn into Binary Bard. It turns out that “she” was a fake and that the evil Binary Bard has tricked you! He will disappear.
Click on the strange wall next to you. A puzzle door will appear, which you must solve in order to get through to the other side. The picture At The Bottom Of The Screen Will Show You How To Solve The Puzzle.
Defeating Mordred:
In the first round, you will be using Merlin, the owl. Fly him over and pick up the explosive bombs Mordred drops. Pick them up and drop them on the green orb on top of Mordred’s robot. Make sure you drop them only while they are flashing red, otherwise it won’t work. Also, avoid the flying bombs he throws, which lower Merlin’s health. Do this two times. Once complete, Mordred will destroy Merlin.
Now it’s your turn! Lure Mordred to the center, just underneath the princess. Then jump on him from under him and onto the princess’s platform. From here jump on the chandeliers on either the left or right. Wait for him to go underneath and he should fire a red laser beam at it, causing it to fall on him. Do this for both sides (if you did it on the left the first time, do it on the right, and vice versa). Once this is done, Mordred will be no more.
Your Reward:
You will then go with the real Princess back to Poptropica be knighted by the King and Queen. The Princess will have had Merlin repaired, and you can find the owl flapping around in the Royal Chamber. You’ll receive the Astro-Knights Island medallion and 100 credits to spend at the Poptropica Store.
To show that you have received your knighthood, the King will call you by your knight name just before you get the Island Medallion. If your character is a boy, it will be “Sir”; for girls, it is “Lady”. This title will then be followed by your Poptropican last name. (For example, if your Poptropican name is Scary Tomato, your last name would be Tomato.) Since Scary Tomato’s character is a boy, he would be “Sir Tomato”. Please bear in mind that this does not apply to your name in multiplayer rooms.
Also, if you look back at the Space Shuttle Fountain, you’ll notice that Mordred’s green orb has been placed there. Power has been restored to Arturus, and the town is saved. Congratulations!

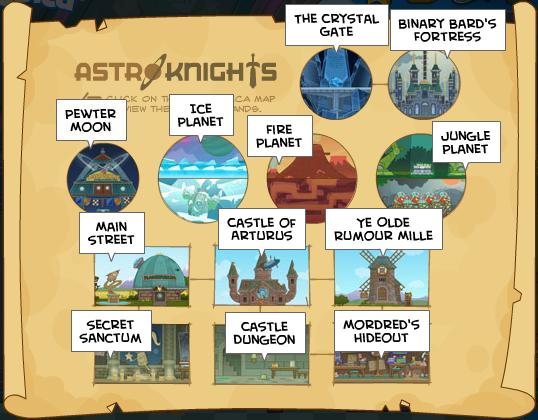